Client Travel Authorization
Send A Travel Authorization Email
Using TESS, you can send tasks to your client allowing them to update contact information, provide payment details, and more!
- Start from the Trip Information tab of a trip, under a client click Schedule automation email.
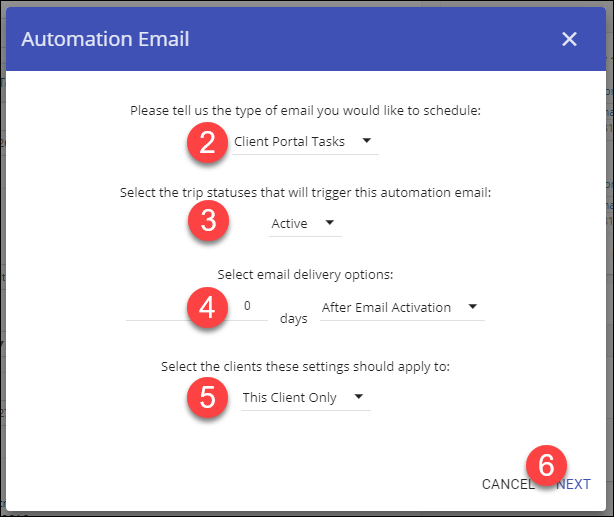
- Choose Client Portal Tasks as the email type.
- Choose the Trip Status types you want it to apply to, you can choose multiple options.
- Choose the number of days and the event type.
For example, choosing 0 days After Email Activation will send the email right away. - Choose whether to send it to just this client or all clients.
Primary travelers will be able to provide information for all travelers,
secondary travelers can only provide information for themselves. - Click Next
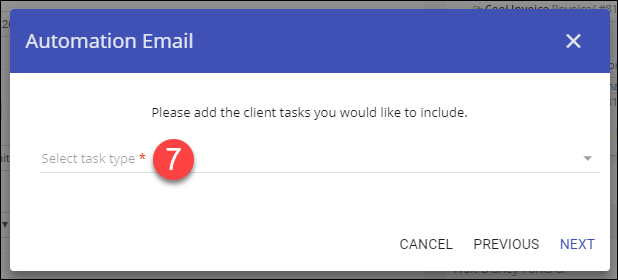
- Begin building your task list by clicking Select task type.
You can send your client a single task or multiple tasks.
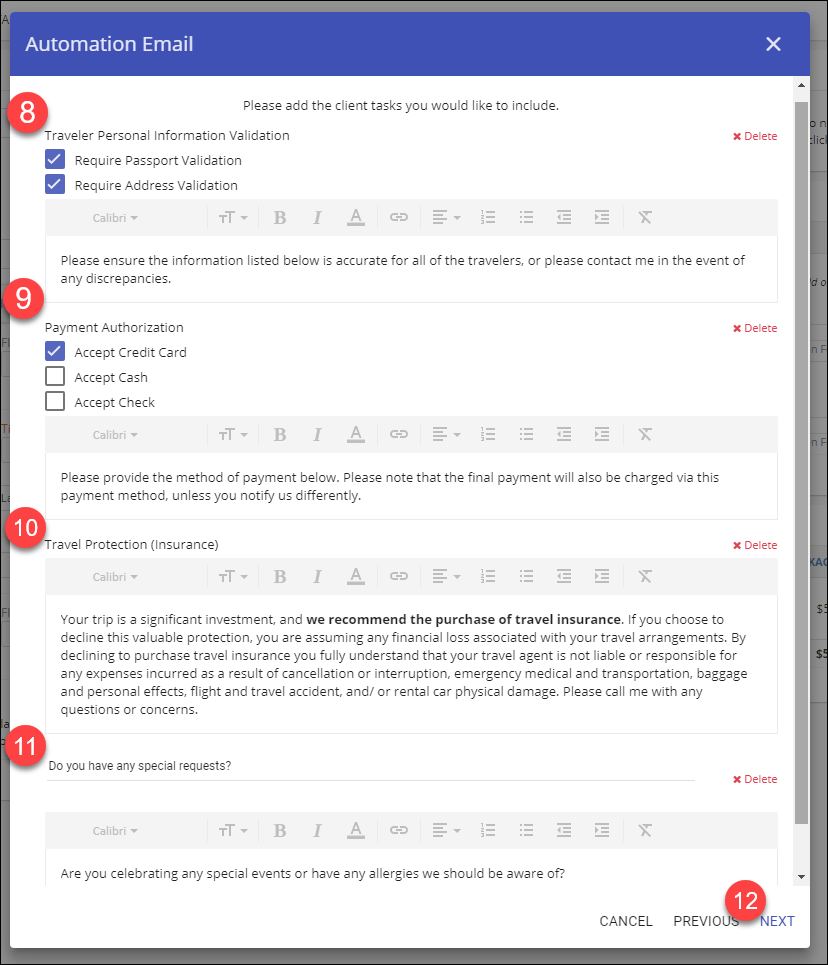
In this example, we have added the following tasks, but yours can be any combination of tasks. - Traveler Personal Information Validation:
You can choose to validate Passport and/or Address information.
The primary traveler can validate for all travelers; secondary travelers can validate for themselves. For each task you can customize the text that your client will see, TESS will remember this for future trips. - Payment Authorization:
Choose the payment types you want to accept and update the instructions as needed. - Travel Protection (Insurance)
- Custom Tasks:
There are several custom tasks available, in this example, we added a custom task for special requests. - Click Next.
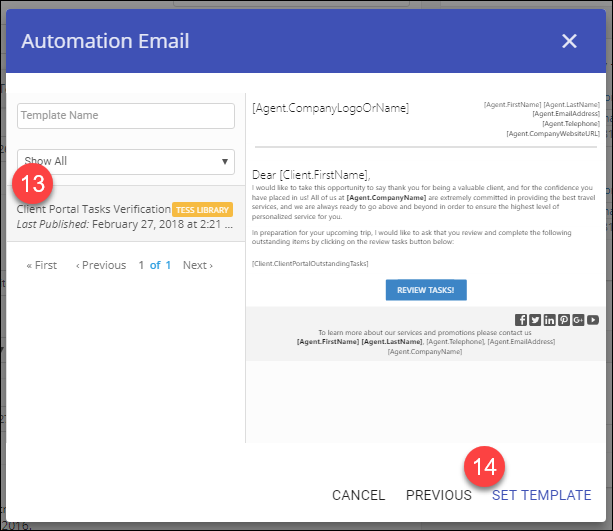
- Click the built-in email template, or use your own if you created one under Templates.
- Click Set Template.
The task email is now schedule and you can see it listed under their name.
Completing Tasks
The next steps in this section are from your client's view.
Exactly what they see will vary depending on the tasks you added and customized.
- Your client will receive an email that looks like this; they just need to click Review Tasks.
-
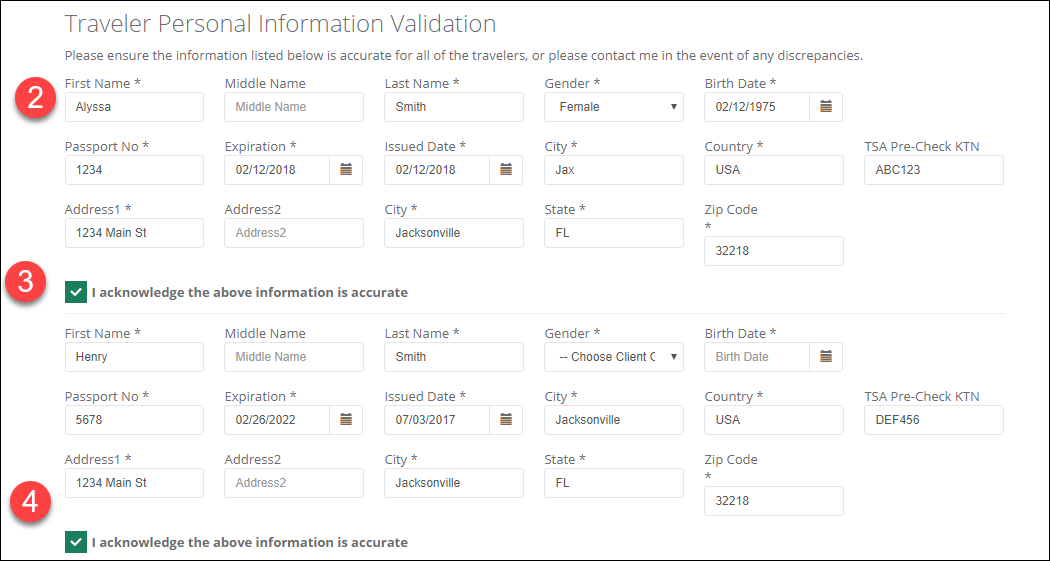
Your client can update their contact information. Fields marked with a * are required.
-
Click the check-box to acknowledge the information is correct.
- If this is a primary traveler, as in this example, they will be able to update other travelers,
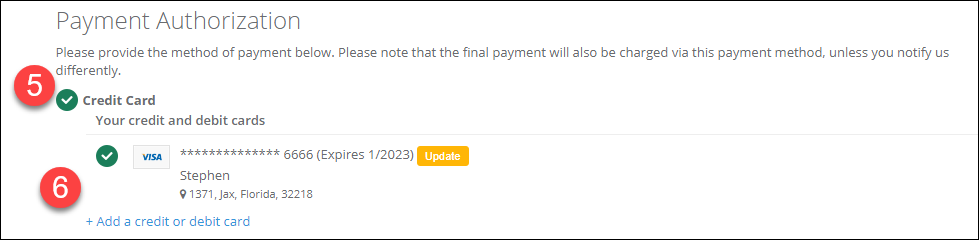
secondary travelers will only see their own information. - Next, your client will choose their payment option if you added that task.
- If they already have a card on file, they can select it, or they can add a new card.
Due to PCI compliance requirements, we are not able to capture the security code. - They will choose Yes or No for Travel Protection (Insurance), if you included this task.
- They will see any custom requests you added.
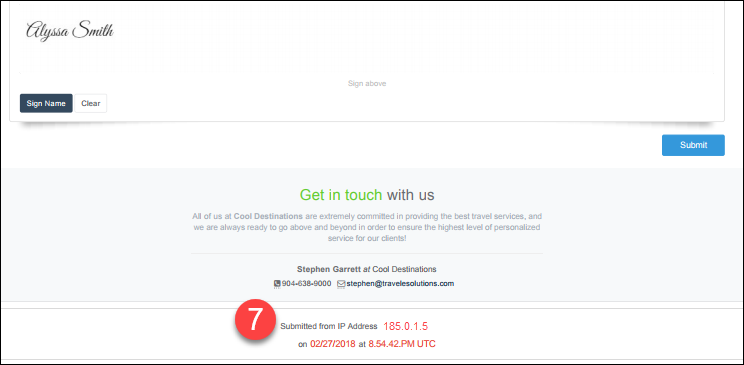
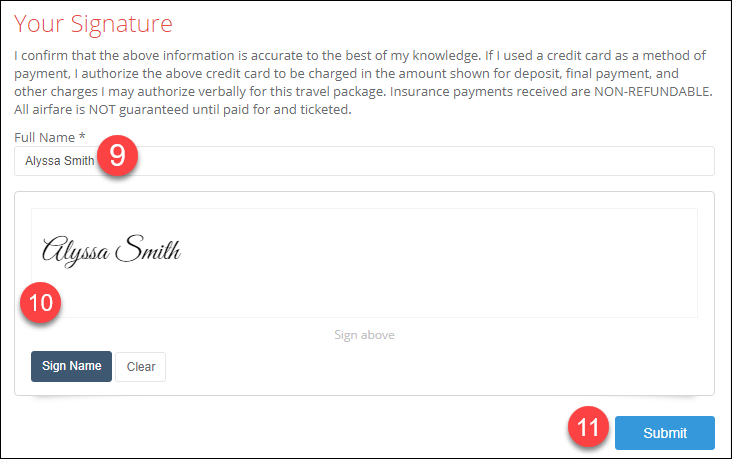
In this example we added a custom task asking if they have any special requests. - Last they will provide a digital signature. They will start by typing their name in the Full Name box.
- They can sign in the signature field with their mouse, finger, stylus, etc. or click the Sign Name button.
- Click Submit.
If they have missed any required fields those fields will be outlined in red,
if everything is completed correctly they will receive a confirmation page.


Viewing Responses
You will receive an email letting you know that your client has completed their tasks,
which you can see by accessing the trip.
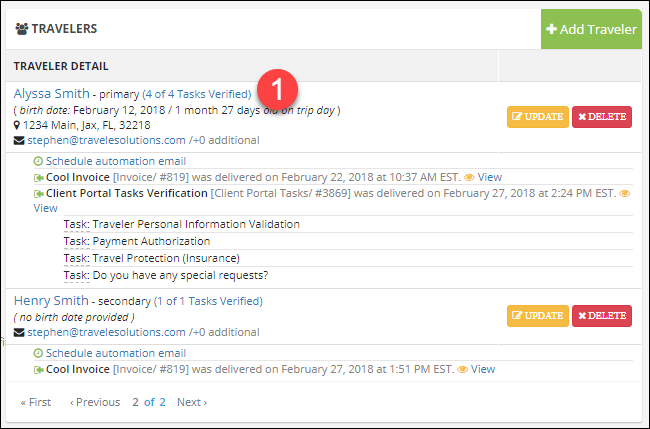
- Access the completed tasks next to the traveler's name.
In this example click on the text 4 of 4 Tasks Verified. - On the window that opens you can review all of the completed tasks.
- If you included an Information Validation task,
you can see which fields they added or changed in red. - You must click Update to accept their changes -
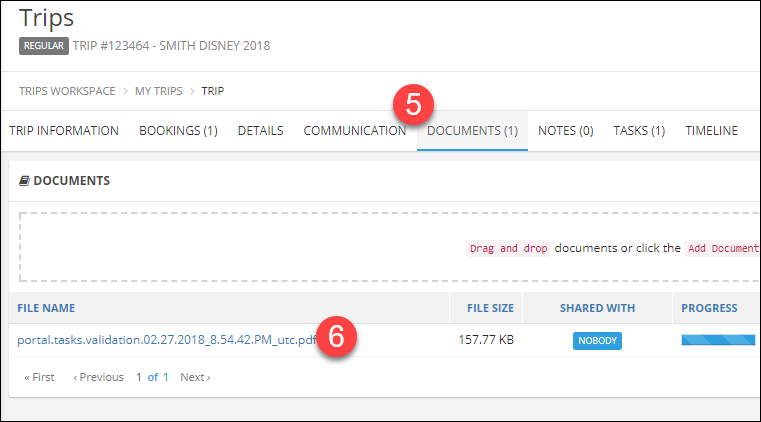
this is to prevent something from changing without you knowing it changed. - A PDF version of their response was also automatically created and added to the Trip Documents.
Click on the Documents tab to access them. - Find and click on the file in the list.
- In the PDF you can see their full response, the IP address that they used and the date and time it was completed.