Pay Agents
In this session, we will learn to record agent adjustments and to generate agent payments. This session assumes you have already reconciled commission checks to bookings. If you have not done that yet, go back and review the Reconcile Checks section.
TESS is not moving money or making payments directly to your agents, but it is calculating their payment based on your company settings, reconciled checks, and adjustments. TESS can calculate payments through any number of sub-agents and sub-agencies, but we are focusing on paying direct agents in this tutorial. TESS will notify agents they have been paid and generate a "pay check stub" that makes it very easy to see what was included in the payment.
Add Agent Adjustment
First, we will review recording agent adjustments, if you do not have any agent adjustments to make, or have already recorded them, you can skip to the next section.
To Get Started
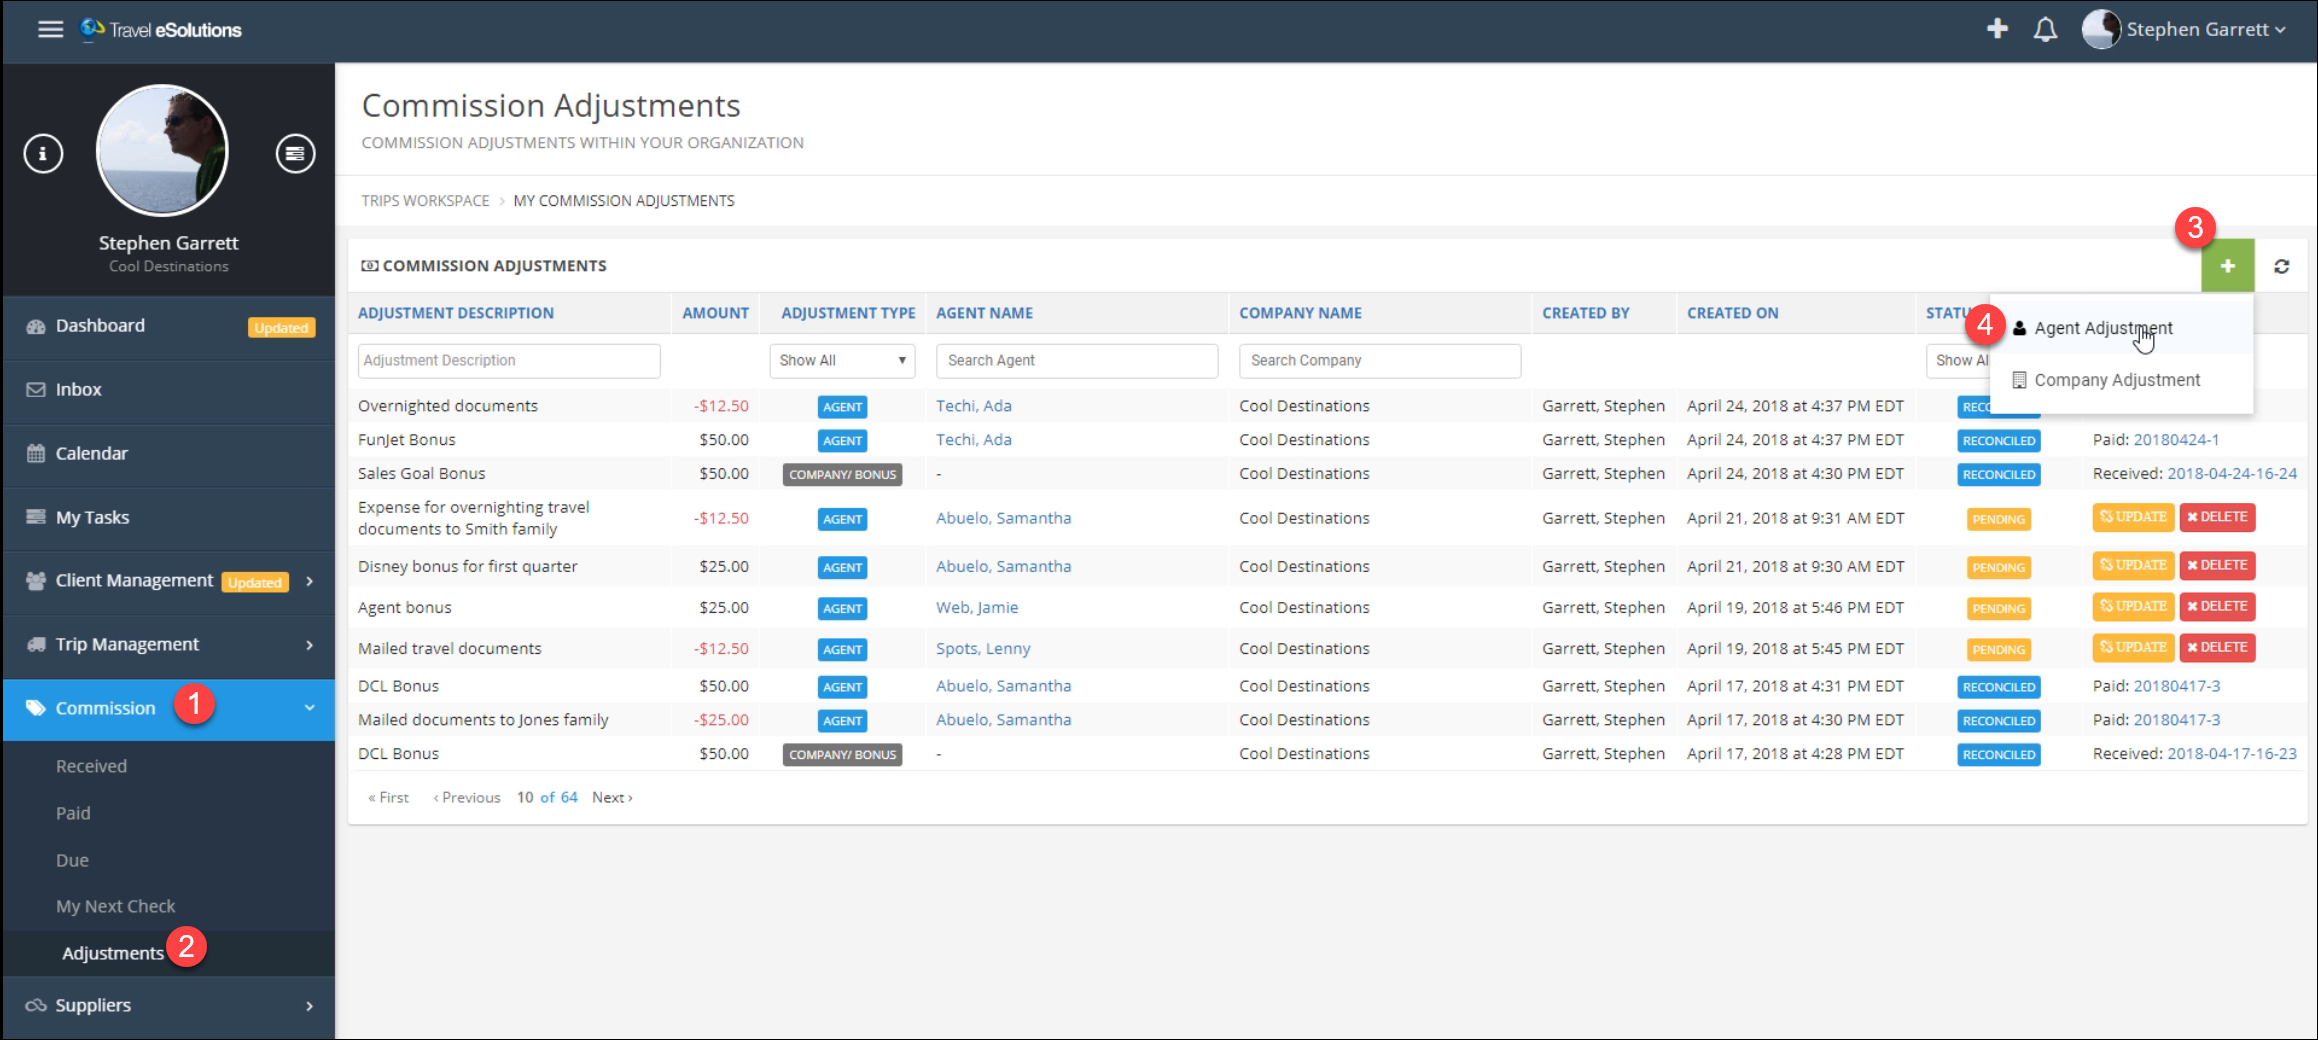
- Click Commission in the main menu.
- Click Adjustments.
- Click the green and white plus (+) symbol.
- Click Agent Adjustment.
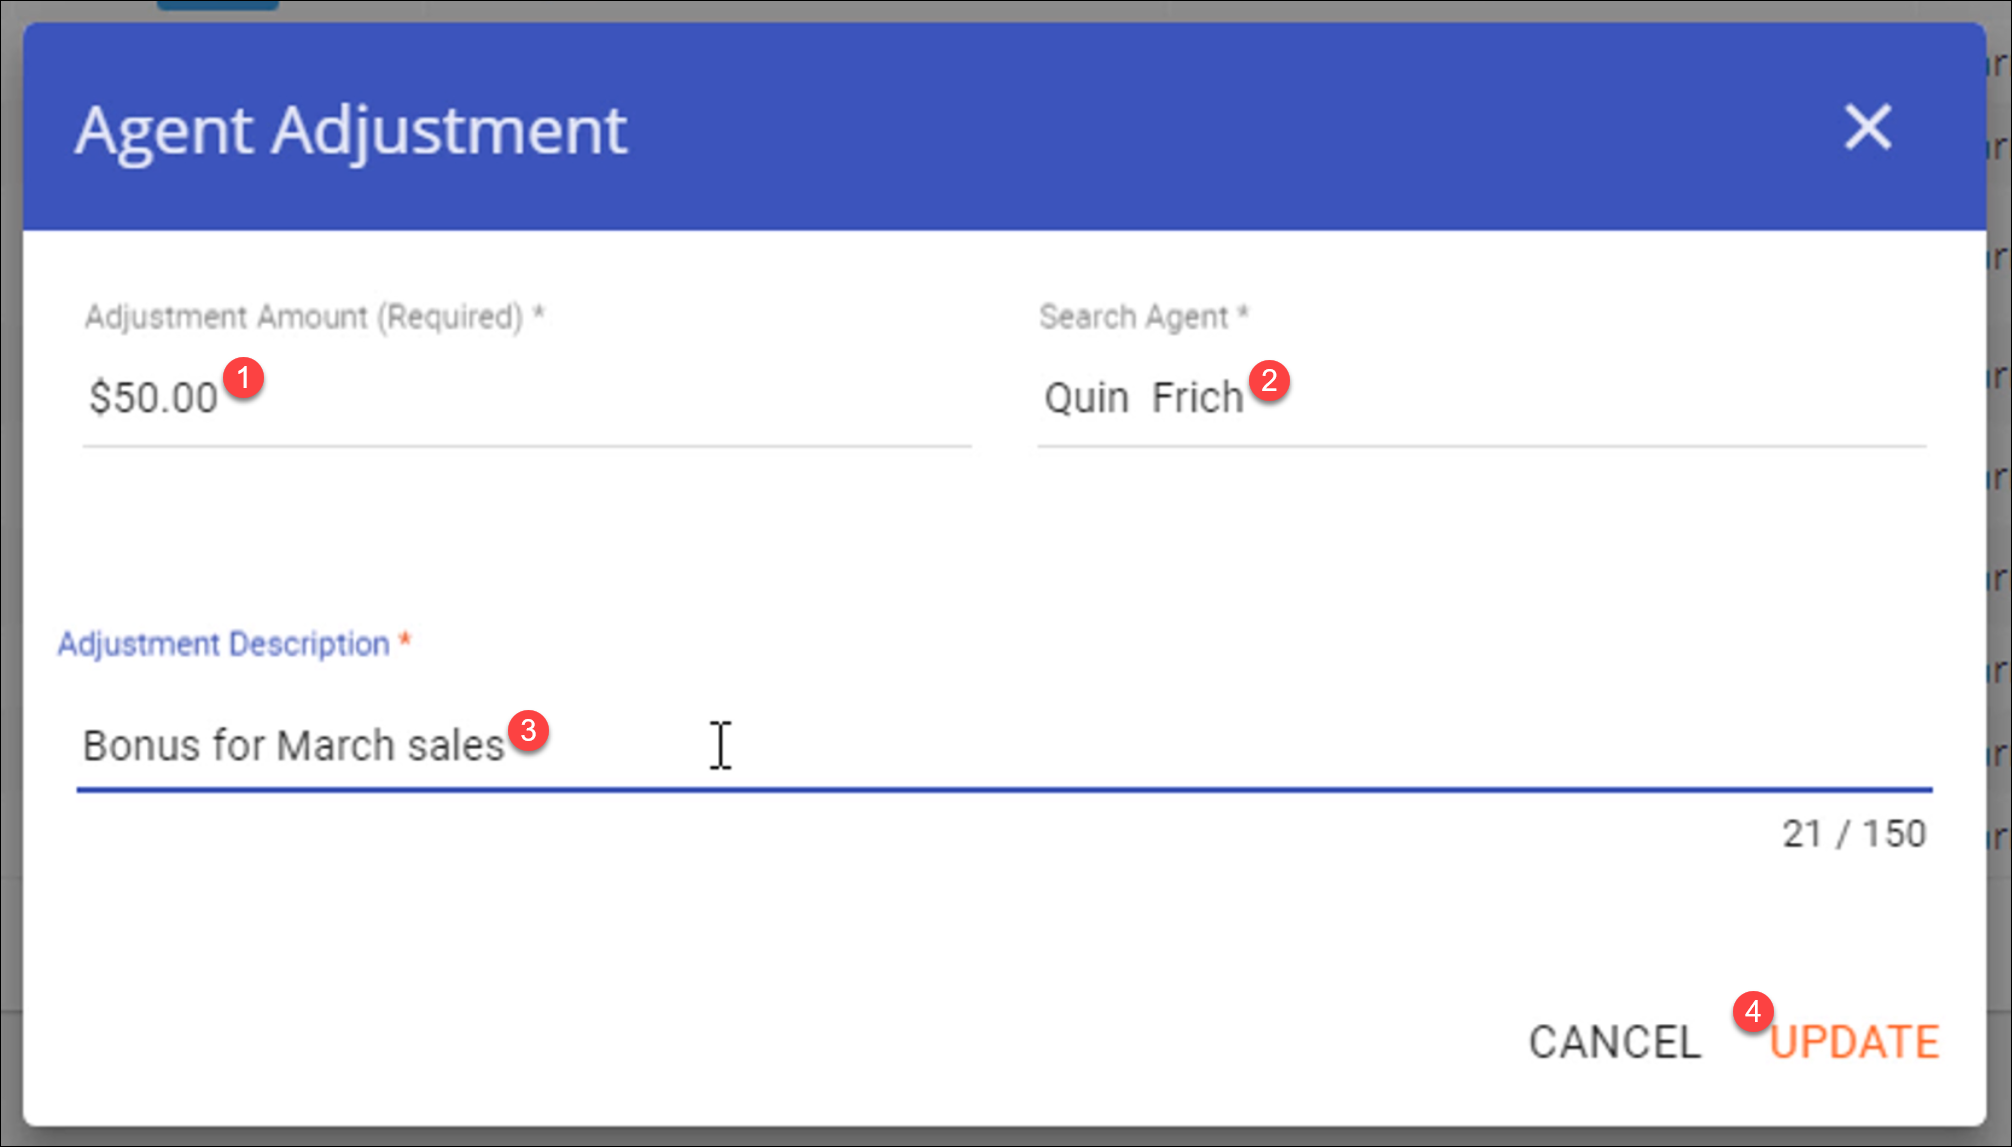
Enter the Adjustment
- Enter the Adjustment Amount. This can be positive or negative. For example, enter a positive amount to give an agent a bonus or a negative amount to withhold funds for expenses or fees.
- Enter the Agent name, just type the first few letters of their first or last name and click on their name when it comes up.
- Enter the Adjustment Description. This is what the agent will see on their payment, so make it short and descriptive.
- Click Update.
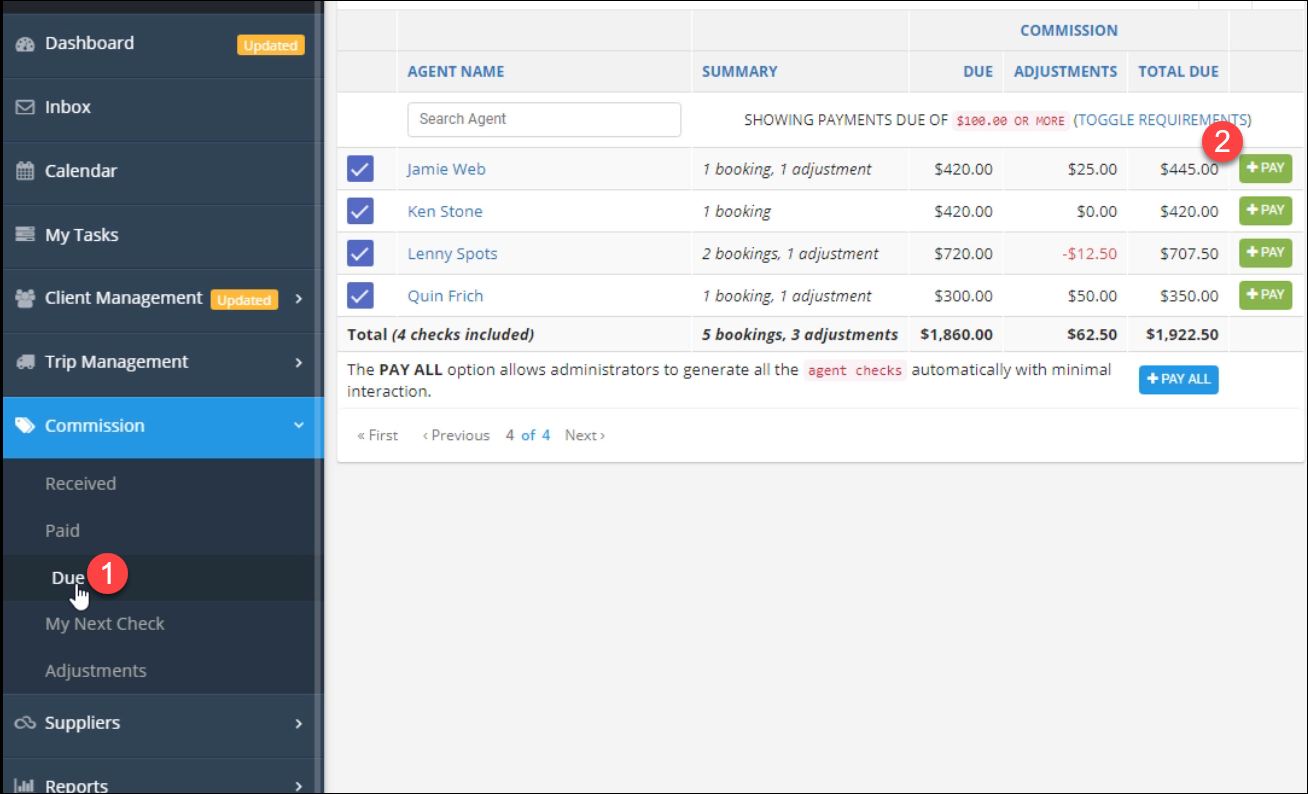
Pay a Single Agent
- In the same Commission menu click Due.
- In the list of agents available to be paid, click the green and white Pay button for the agent you want to pay. You can view the bookings and adjustments that will be included in their check here.
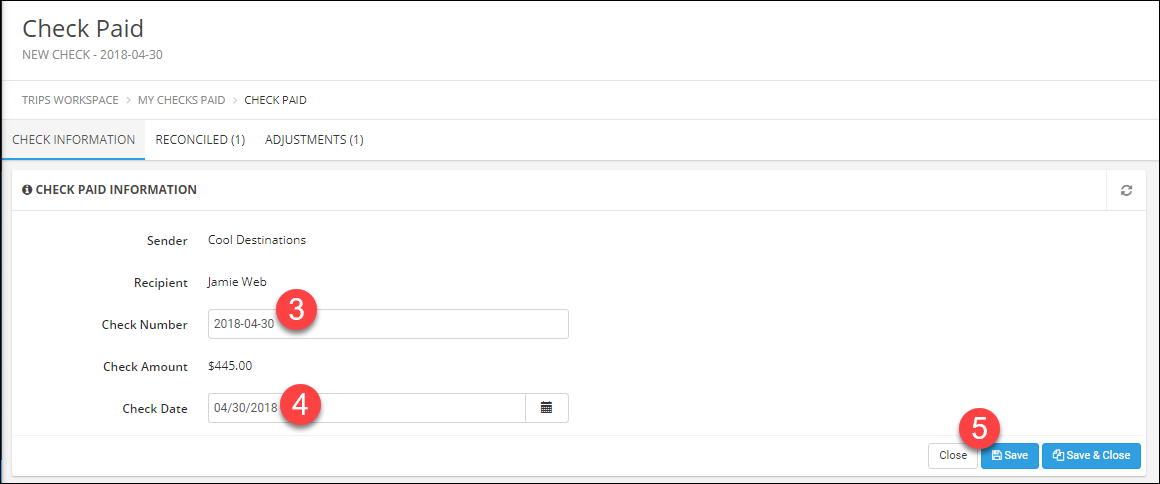
- Enter the Check Number. If this is an electronic payment you can use a transaction number. If you do not have a number to use, you can use a formatted date as in our example, or any unique number that makes sense for your process
- Enter the Check Date, which should be the date you are issuing the funds (sending a check, making an online payment).
- Click Save.
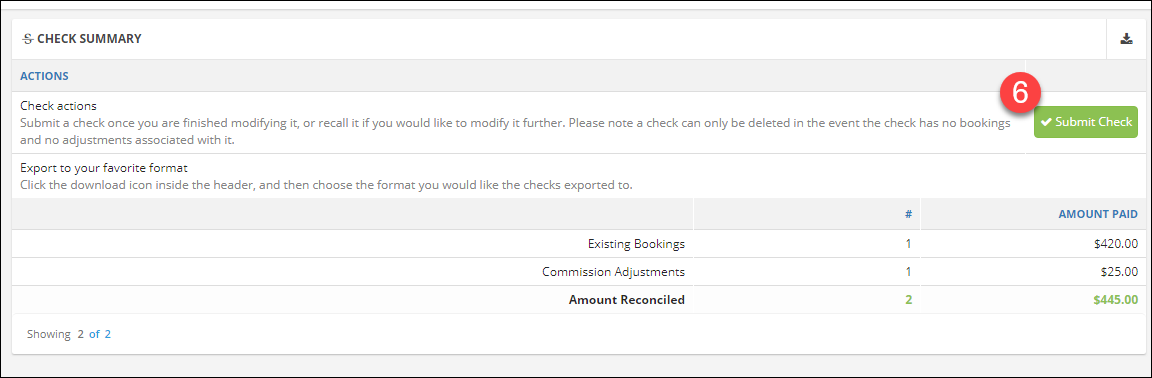
- Click Submit Check. In the confirmation window click Submit.
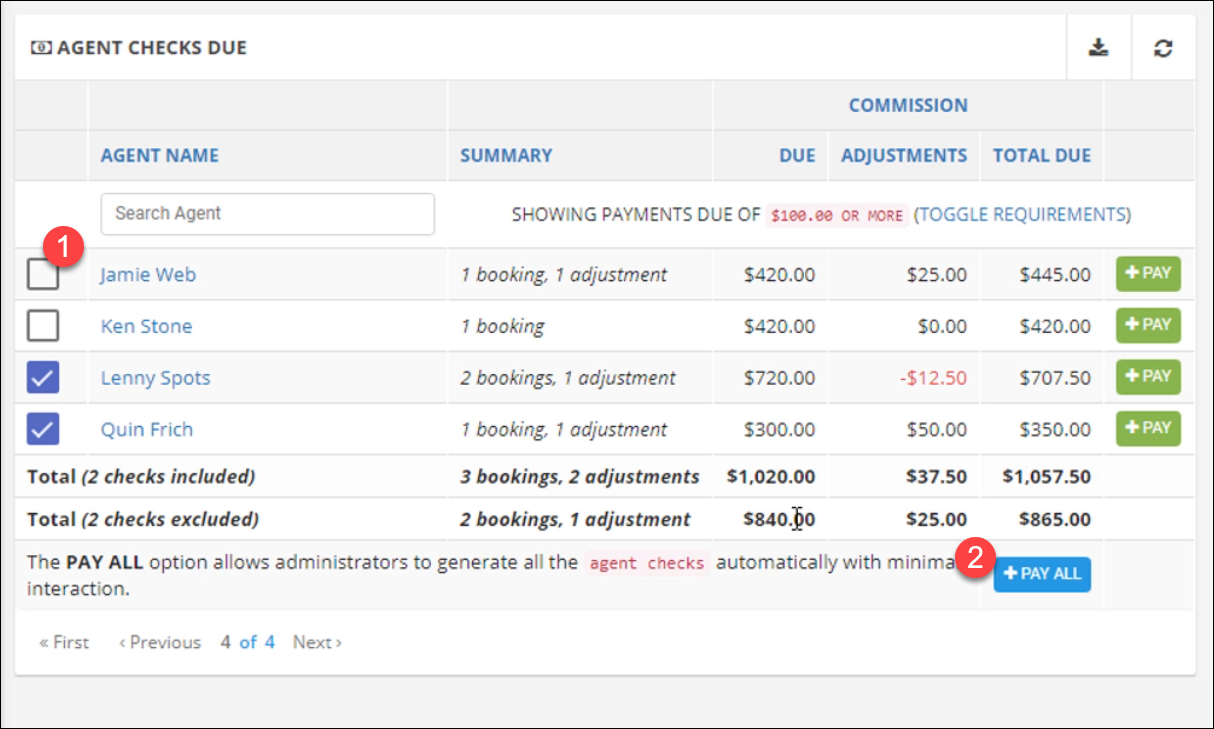
Pay Multiple Agents
Return to the Due menu item.
- Uncheck any agents you do not want to pay right now.
- Click the blue and white Pay All button.
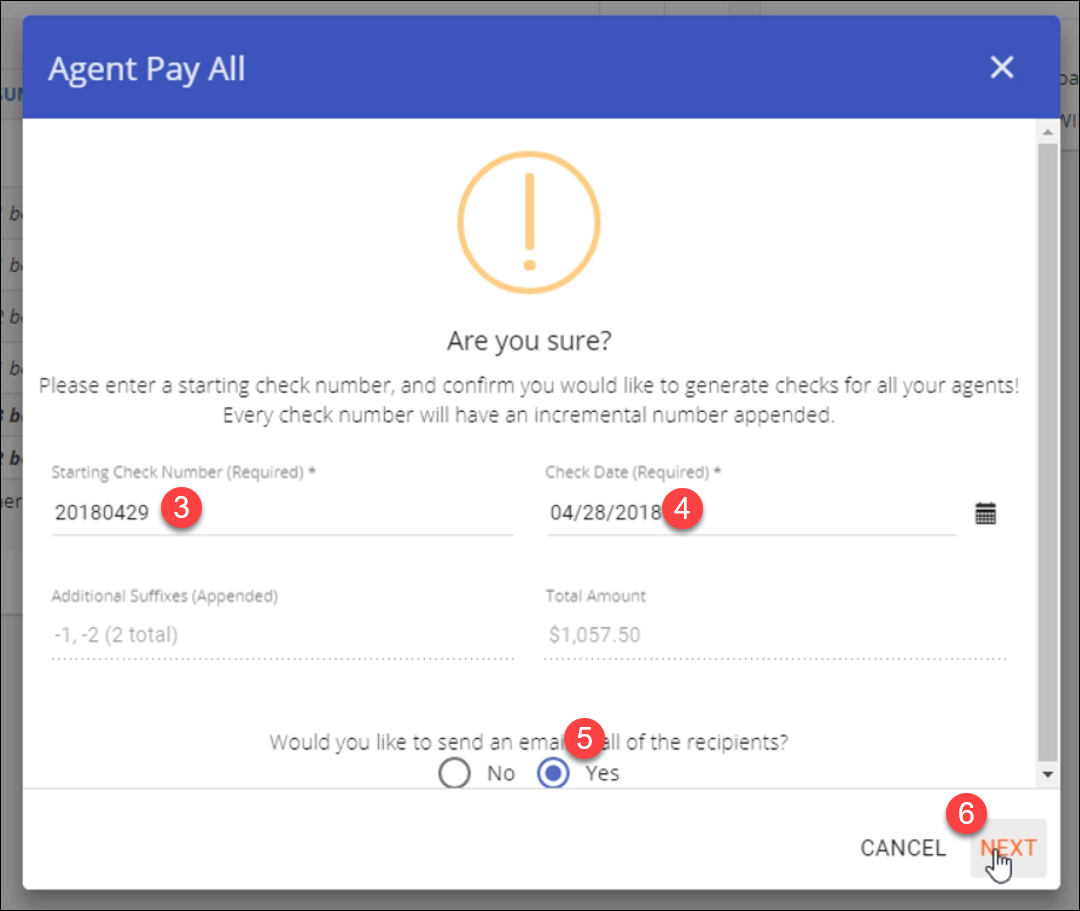
- Enter the starting check number, this will default to a formatted date, but you can change it.
- Enter the Check Date, this will be the day you are issuing the funds (mailing a check, sending an electronic payment).
- Optionally, you can send your agents an email to let them know they are being paid.
- If you are not sending an email this button will say Pay All, click this and skip to step 9. If you are sending an email click Next.
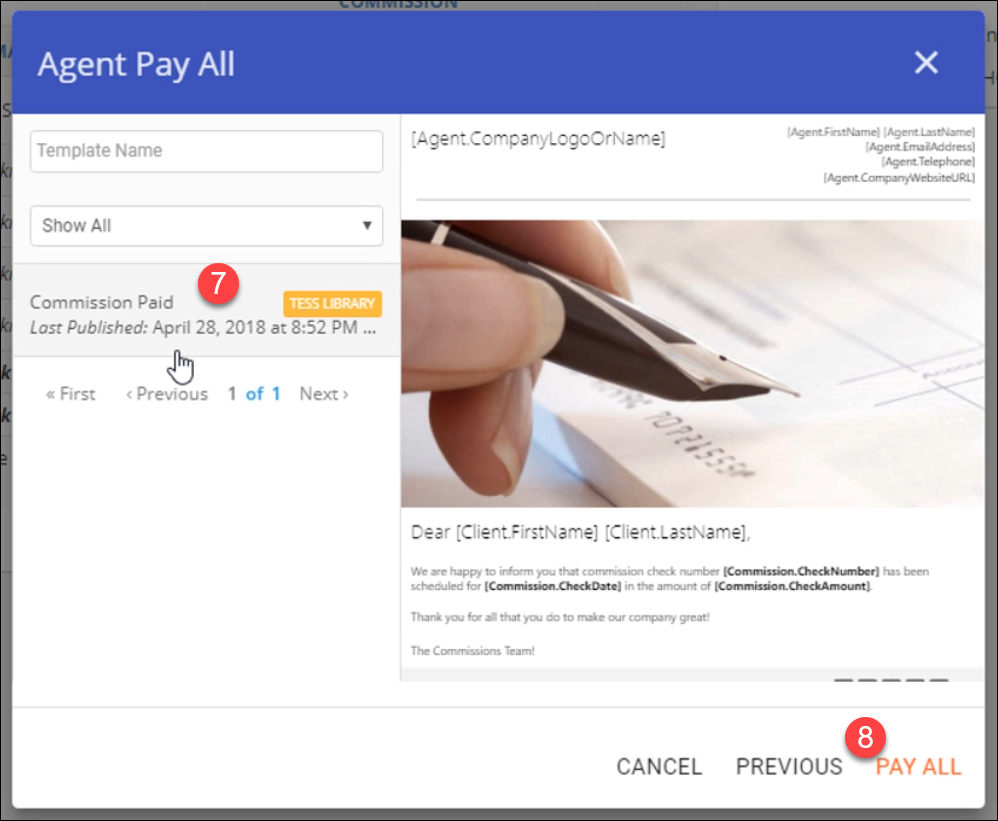
- Choose the email template you want to use. TESS comes with one built in, but you can also create a custom template (not covered in this section).
- Click Pay All.
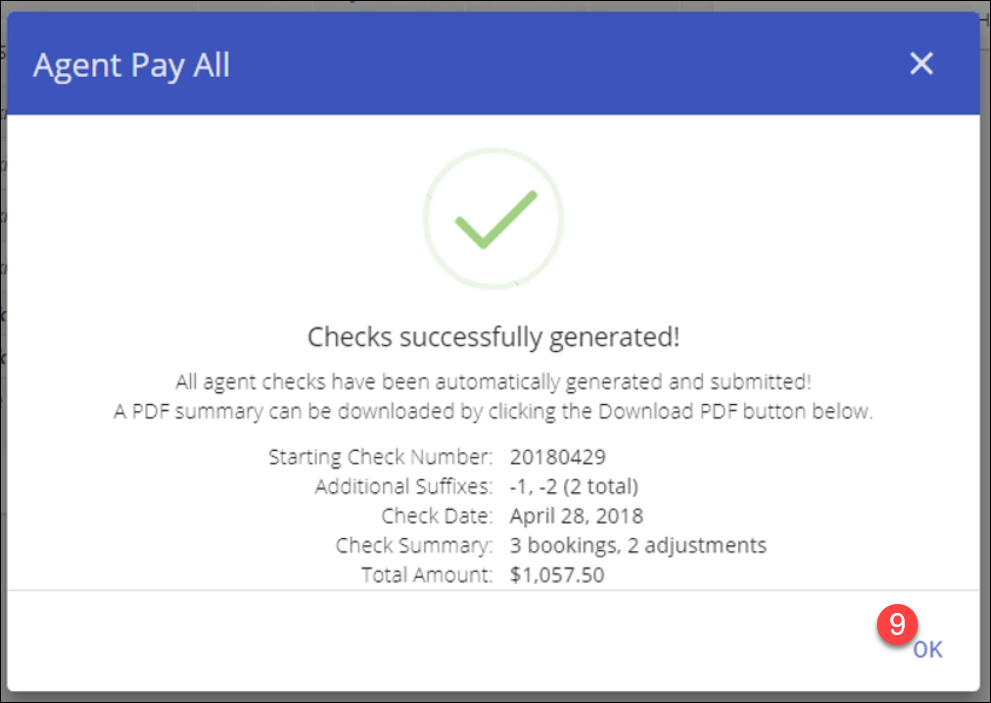
- Review the confirmation dialog and click OK.
Issuing Funds
The easiest way to make the payments is by using an export of the checks you just generated.
There are a lot of options for paying your agents. Most agencies either write physical checks or more commonly use online bill pay through their business checking account.
To use online bill pay for most banks, you can just set up each agent as a Payee, then when you are ready to pay them you just have to enter the amount. Each bank's system is a little different.
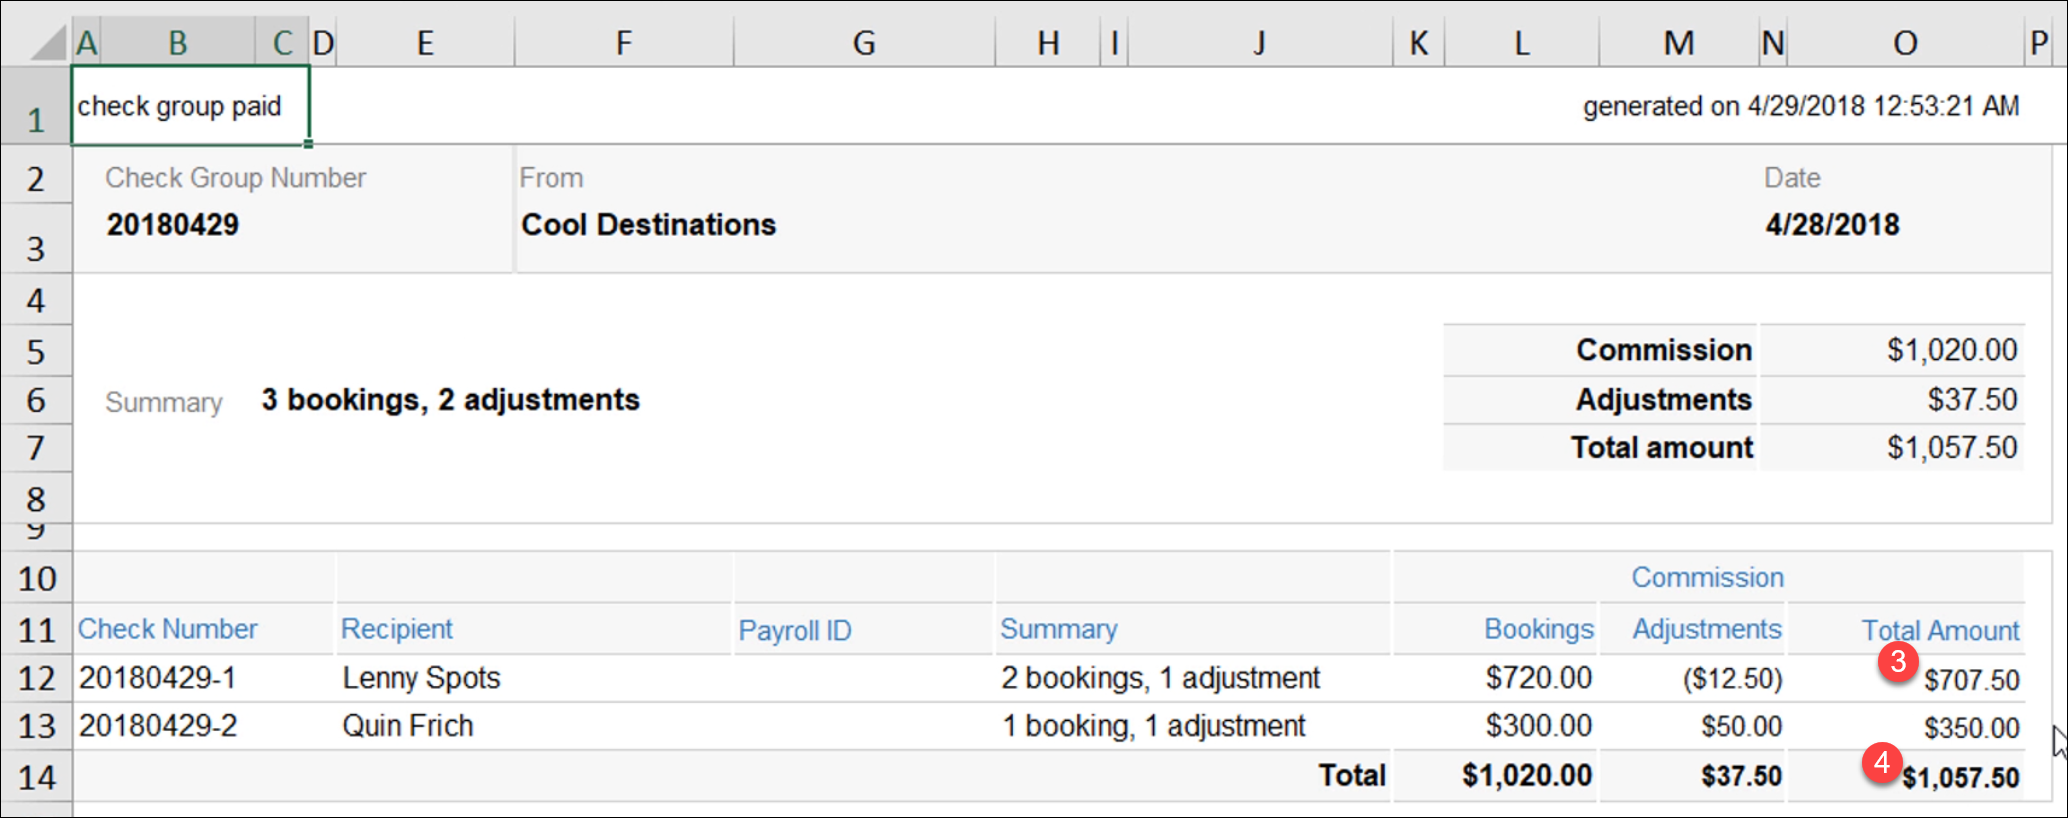
In the Commission menu click Paid, to view all of the payments you have generated.
- Click the download icon.
- Click Export to Excel.
- With the spreadsheet open, use the Total Amount field in for each agent line to issue payments.
- Make sure your total payments match the Total amount in the file.
Agent View
Agents can view their payment information in several places. If you chose the option to send them an email, they will get a summary of their payment in the email and a link to view the details.
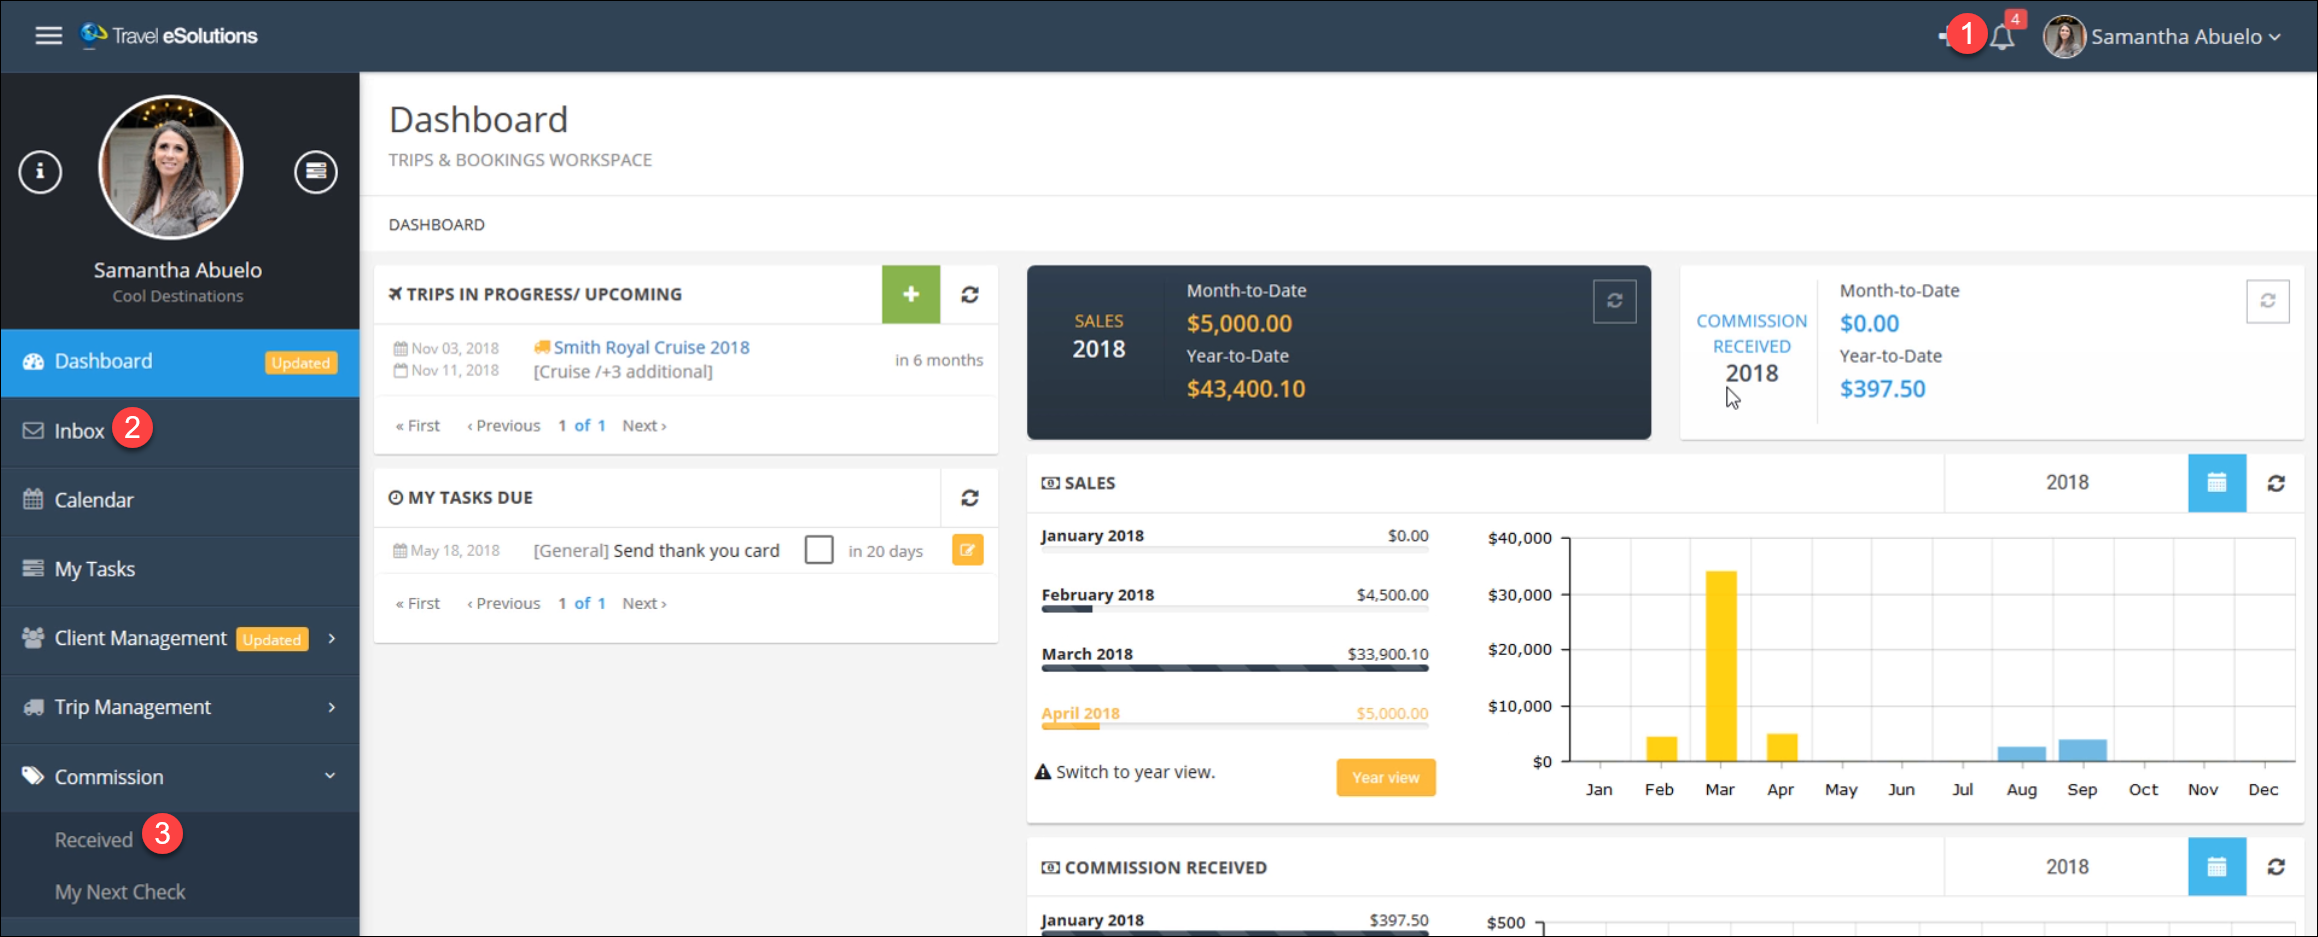
- They will receive a notice in the Bell icon, letting them know they have an Inbox message.
- They can go directly to their Inbox to view current or past notifications.
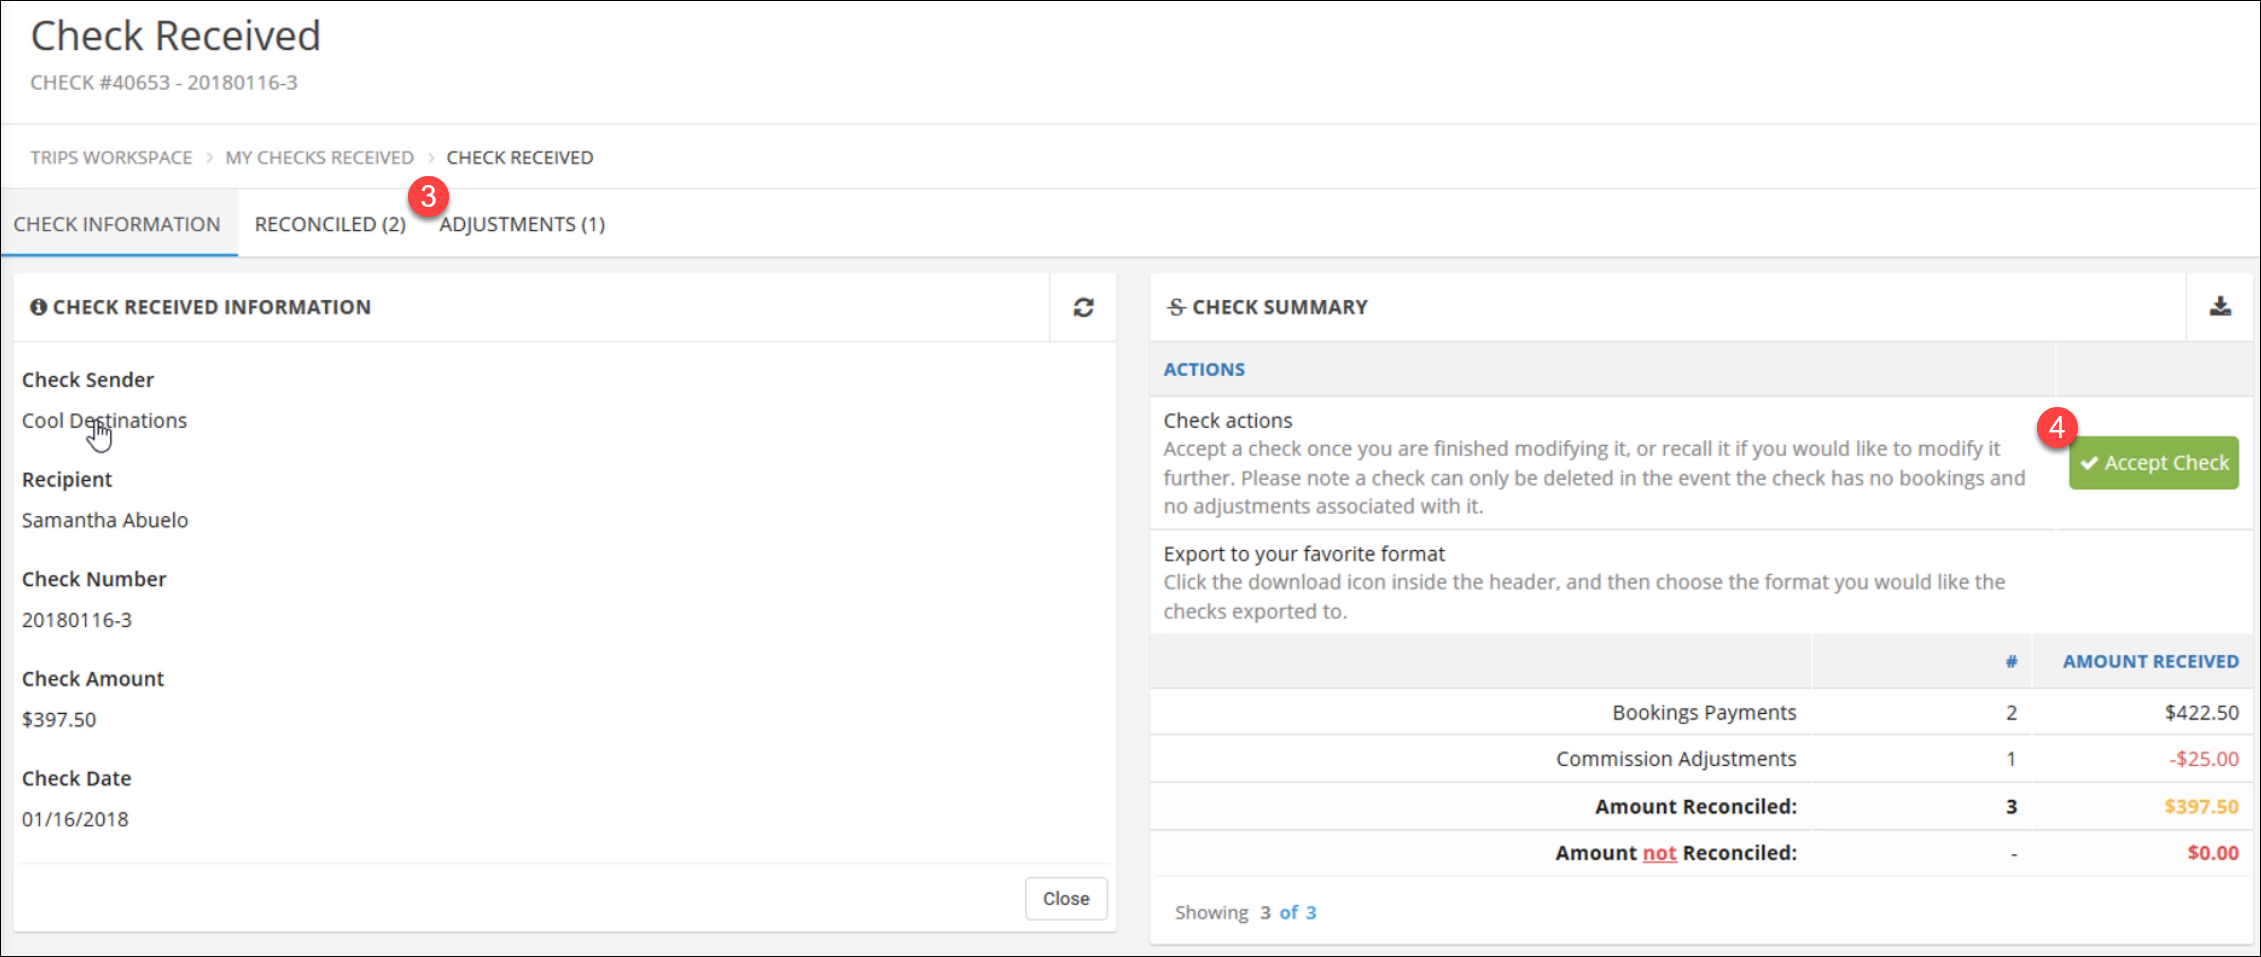
- They can to their Commission section and click Received to view the current payment and past payment information. By clicking on a check here, they can see the full details of bookings and adjustments included in the check.
- From this screen, they can also "Accept" the check. This is not required, but it is a good way for your agents to let you know that they received and agree with their check.
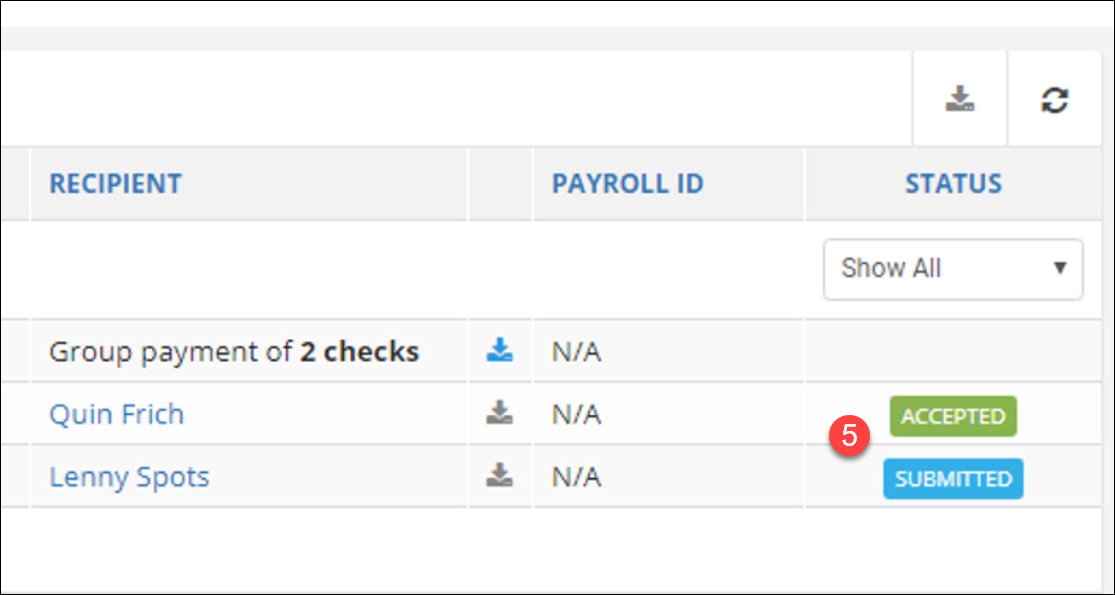
- Back in your view, you can see which agents have and have not accepted their checks.