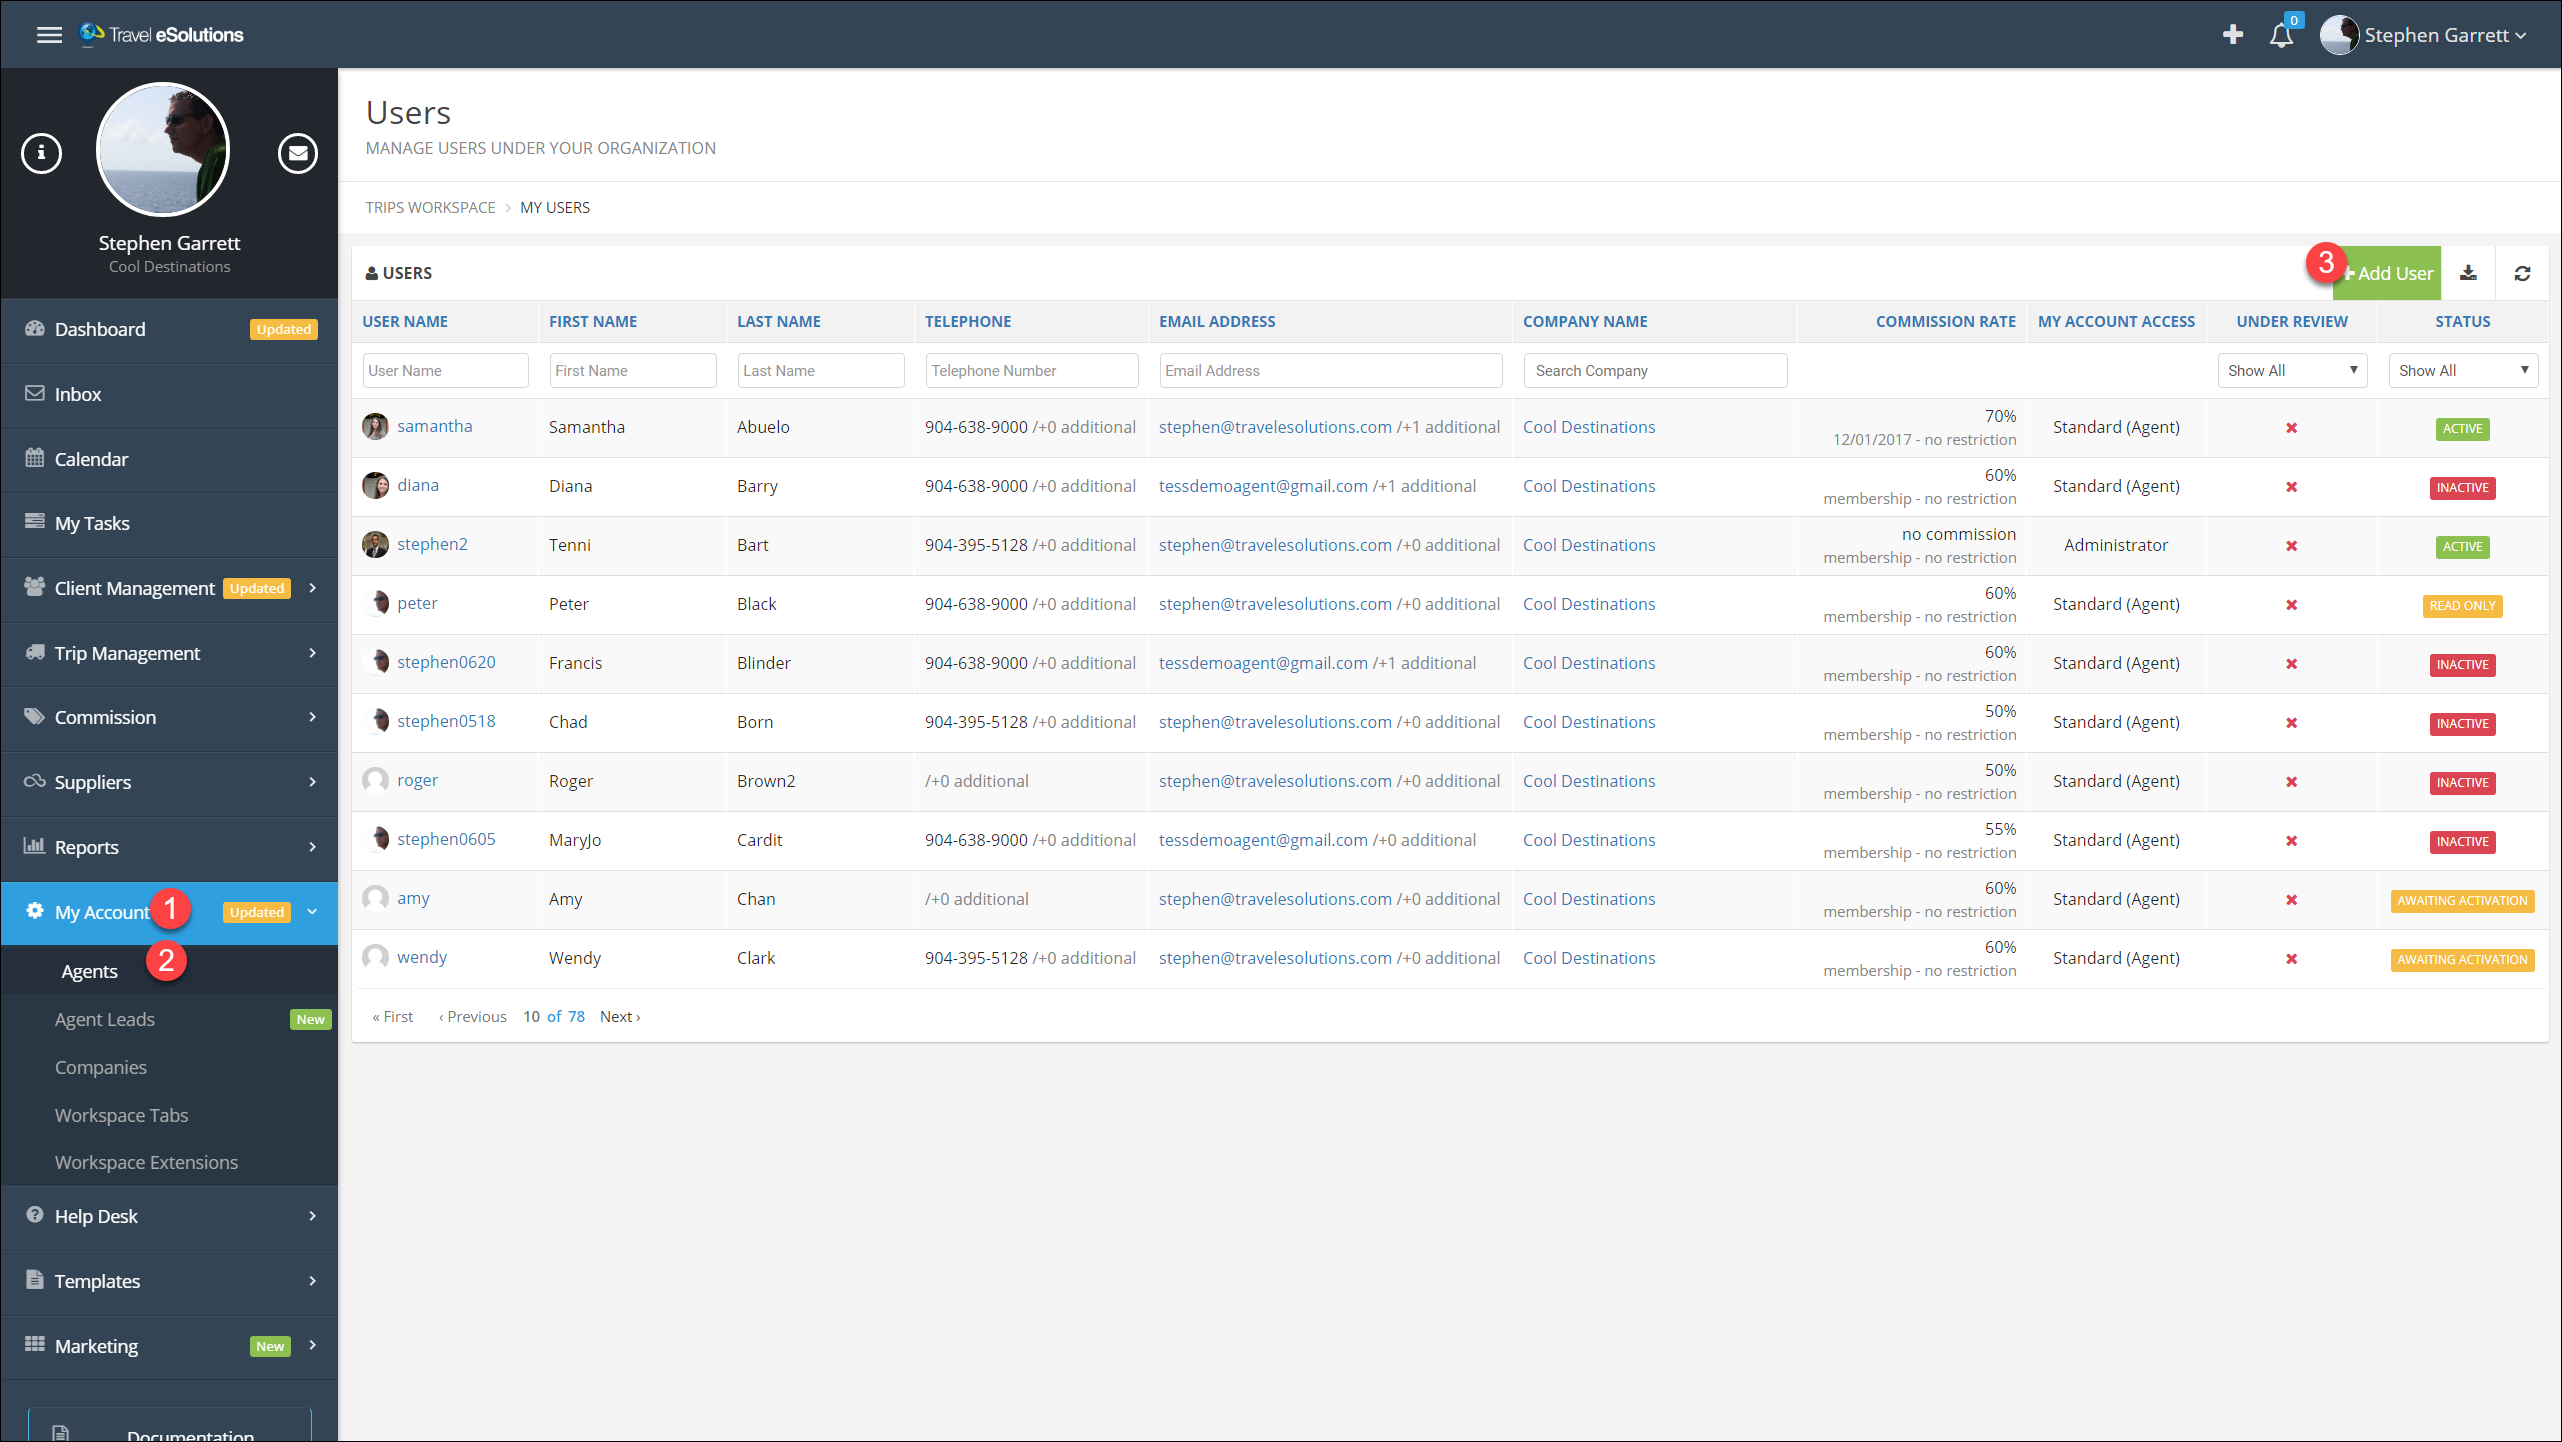
Managing Users and Sub-Agencies
Add an Agent (or other user)
- Click My Account in the main menu.
- Click Agents.
- Click Add User.
- Enter a username.
This only needs to be unique within your agency so use something simple like a first name, first initial and last name, etc(required). - Enter the user's first name (required).
- Enter the user's last name (required).
- Enter the user's primary email address (required). The user will be able to change or add additional addresses later.
- Choose the user type (required).
Important! Be sure to set the user to be an Agent unless you want them to have access to all agency information. - If the user will receive commission payments, check the box and enter their initial commission rate.
- Click Save
After you click Save, you can add more information, such as phone numbers or alternate email addresses.
The agent will automatically receive an email asking them to activate their account.
Note: Do not change the user status from Awaiting Activation to Active.
The account will activate when the agent follows the activation link in the email.

Resetting an Agent's Password
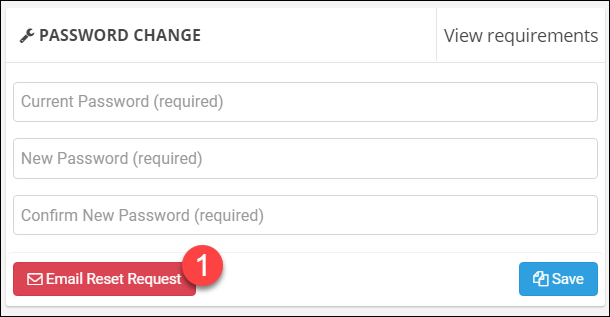
- From the User Information tab in the Password Change area, click Email Reset Request.
The agent will receive an email with a link and instructions to reset their password.
Note: This will not work if the agent has not activated their account!
Resend The Activation Email
The activation email was sent when you created the account,
but if you sent it to the wrong address or the invitation expired it is easy to send a new one.
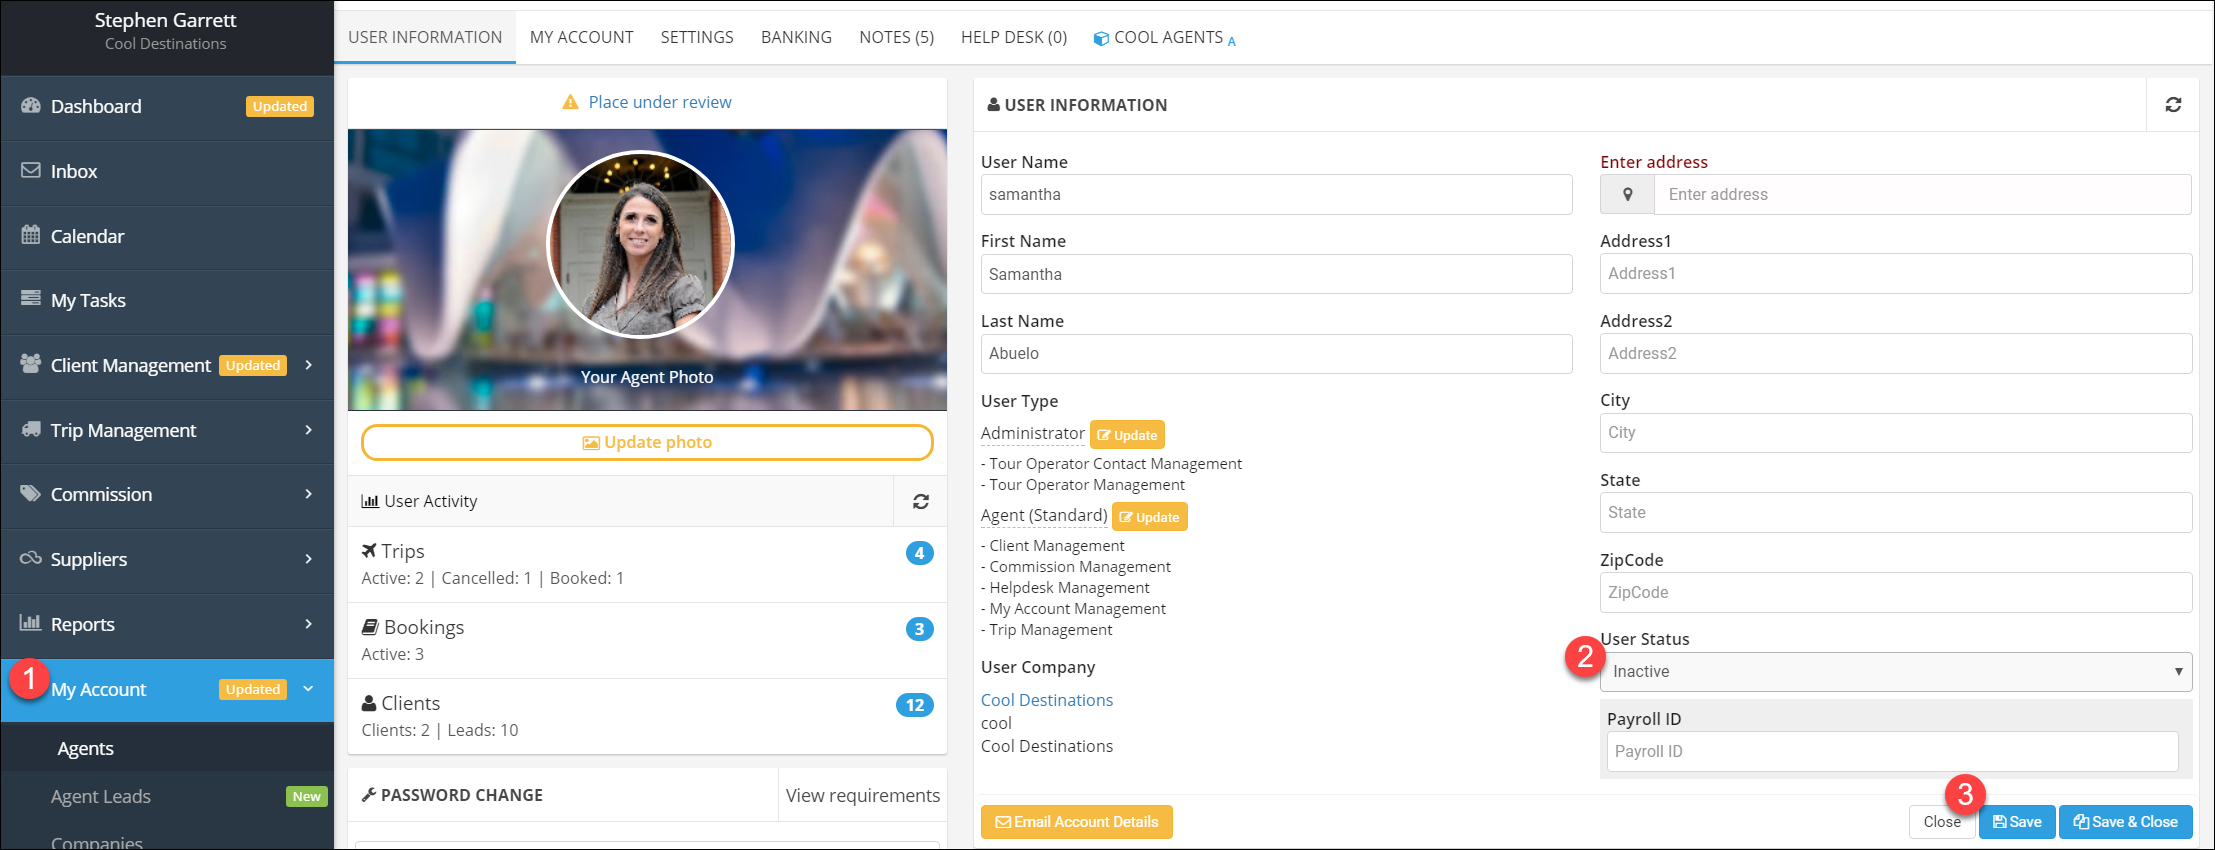
- Open the agent's profile from your agent list (see step one) then click the My Account tab.
- If their account has not been activated there will be a Resend Activation Email, just click the button!
Deactivate an Agent
If you have an agent leaving your agency, it is very easy to deactivate their account.
After you deactivate them, they will have no access to the system.
As the admin, you will still have access to any data they entered in TESS.
- Open the agent's profile from your agent list (see step one).
- Change the User Status to Inactive.
- Click Save.
To reactivate their account, just change the status back to Active!
Manage User Permissions
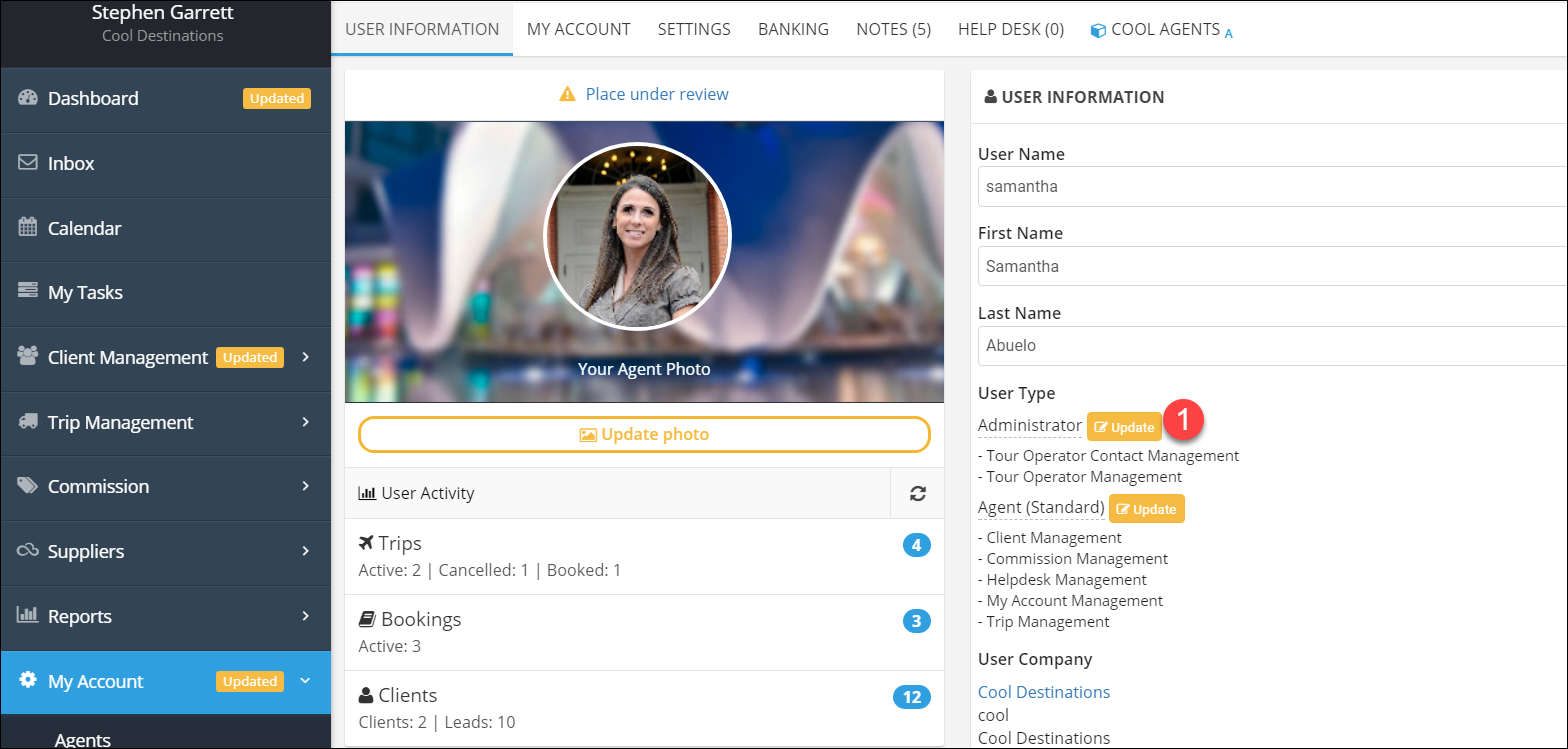
- Open the agent's profile (see step one) then click Update in the User Type area (either button, they do the same thing).
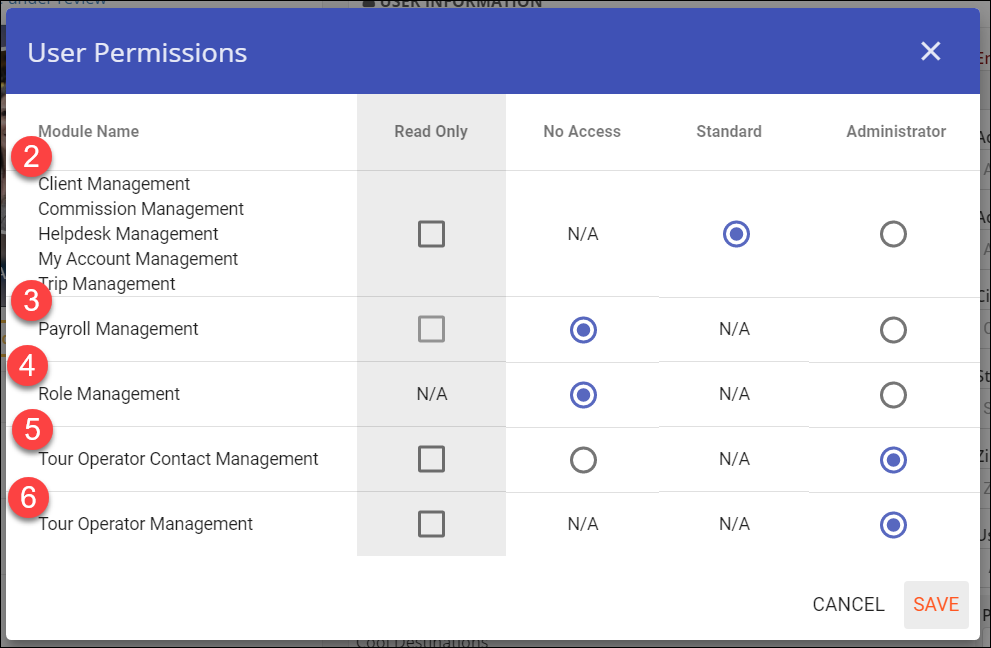
- The first set of options primarily controls access to clients and trips.
When set to Administrator the user will have access to all trips and clients across the agency.
When set to Standard they will only have access to their own trips and clients.
Either setting can be combined with the Read Only check box, for example, you may have an accountant who
you want to have access to all trips and clients, but not be able to change any of them. - Payroll Management: Controls the ability to reconcile checks and pay agents.
- Role Management: Allows the user to get to this screen. Note that even with this setting, a user cannot change their own permissions.
- Tour Operator Contact Management: Allows or prevents agents from adding their own contacts to Tour Operators.
- Tour Operator Management: When paired with the agency setting above, you can allow this for the agency as a whole but restrict it for specific users.
Most options can be paired with the Read Only flag, and most options do not have a Standard option, only No Access and Administrator.
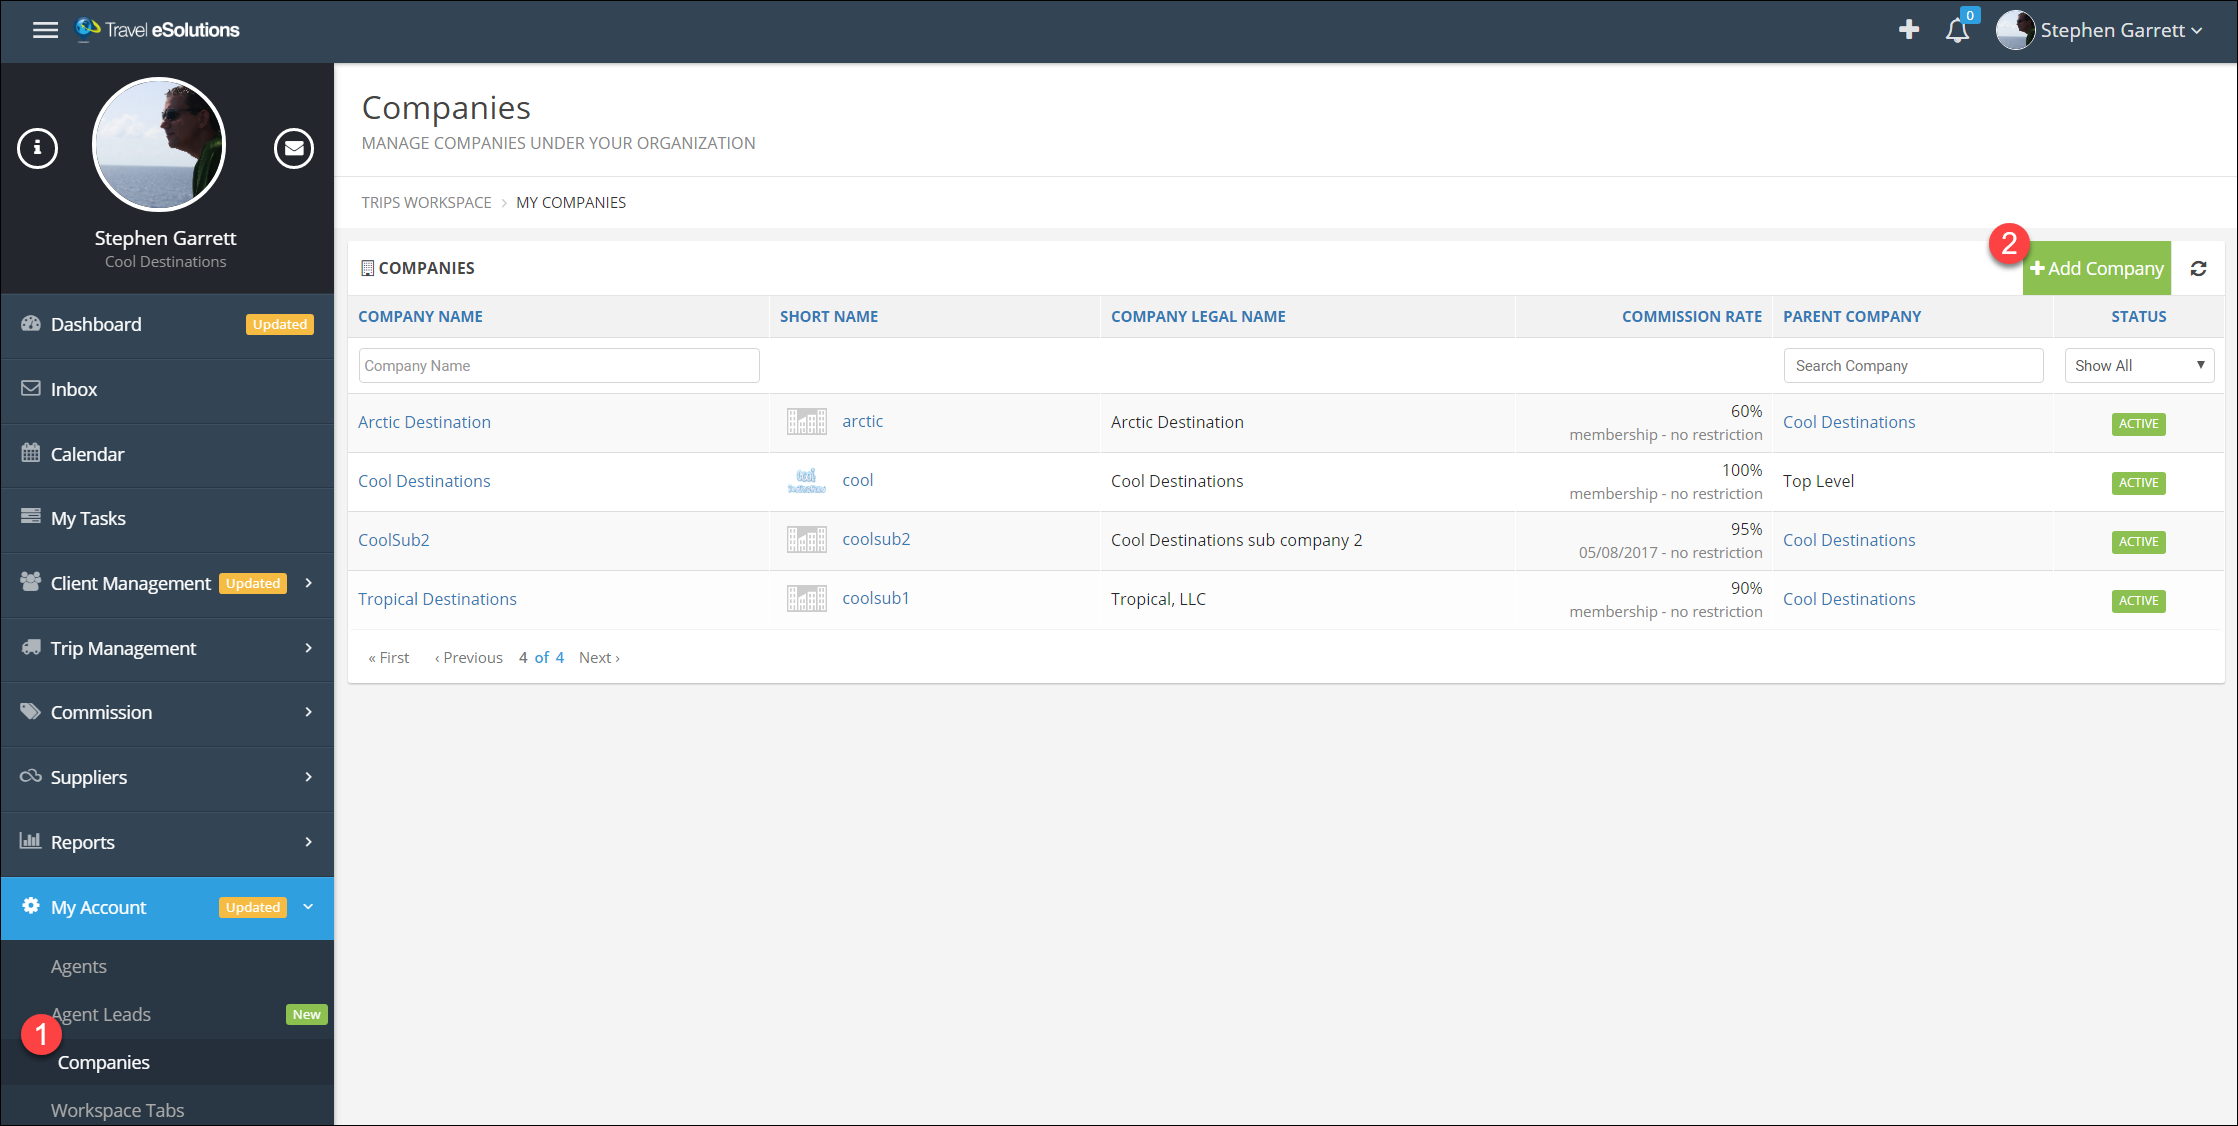
Manage Sub-Agencies
Sub-Agencies are useful when your agents work under their own brand or when they may have agents
of their own who do not have a direct relationship with you.
To Create a Sub-Agency:
- Click Companies under the My Account menu in the main menu.
- Click Add Company.
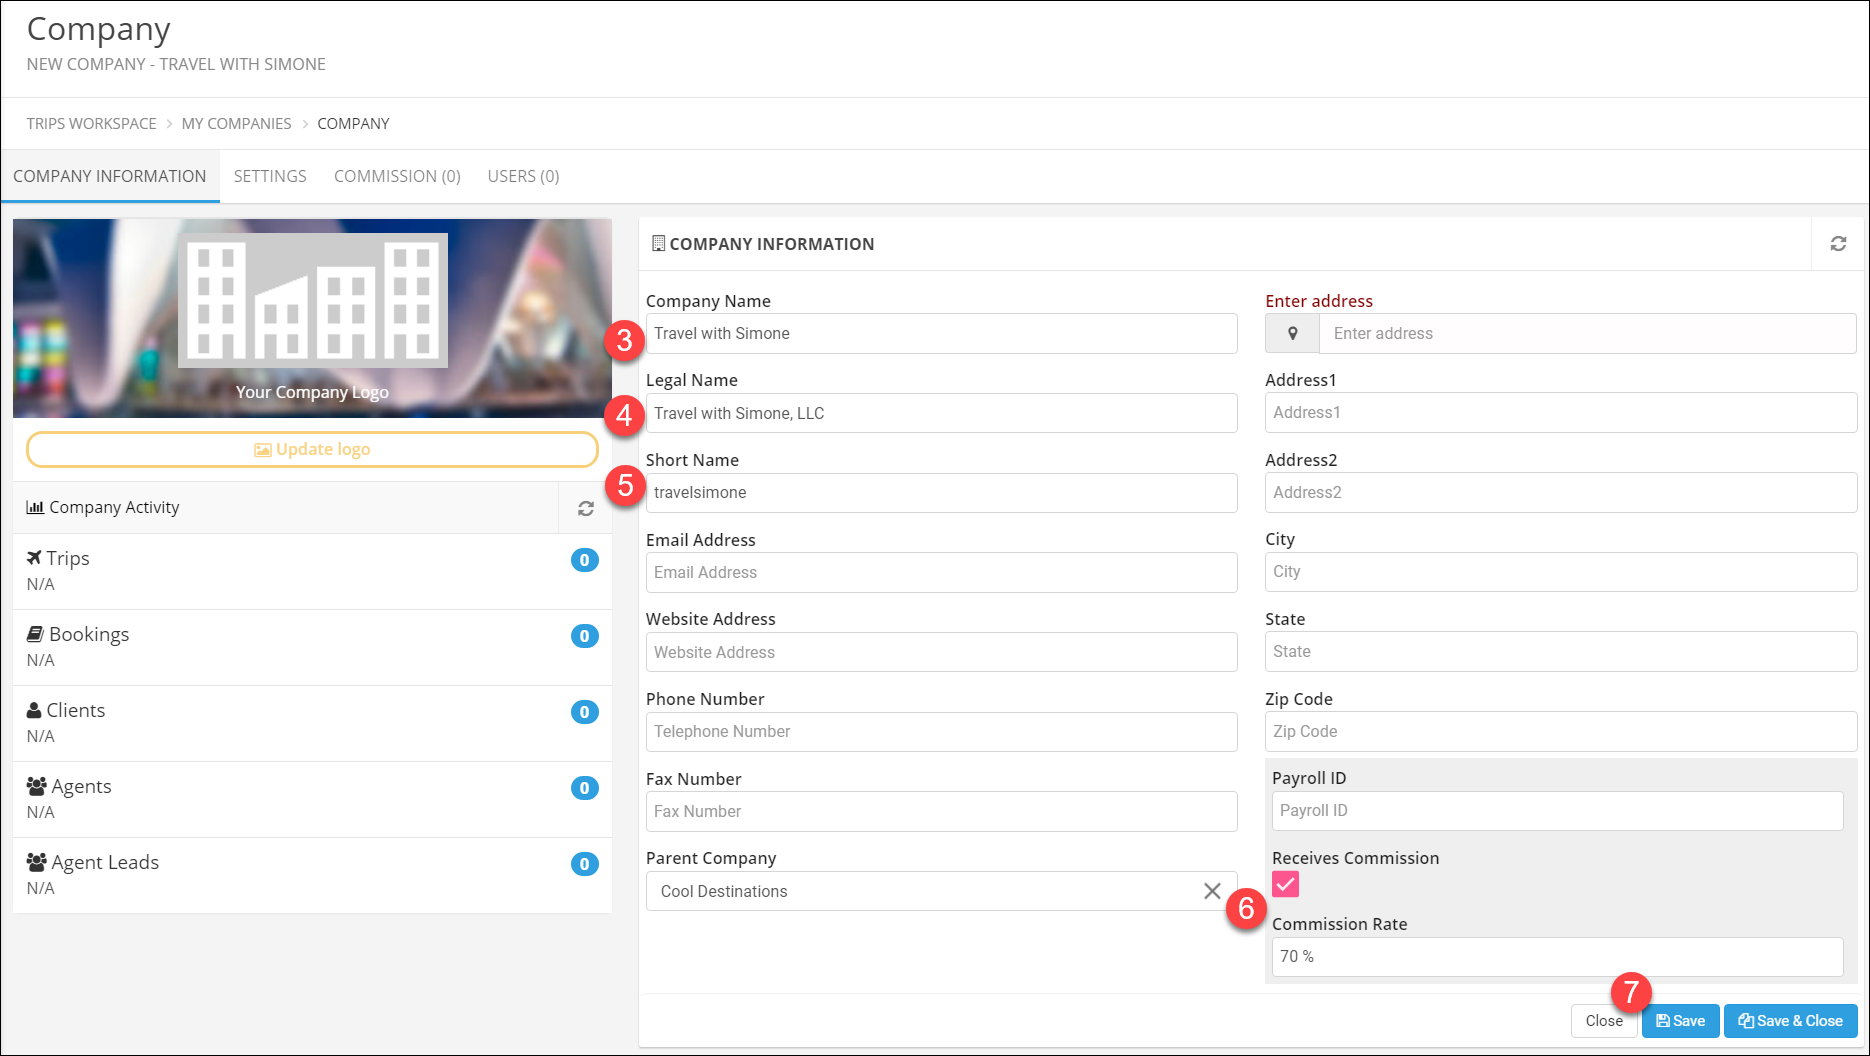
- Enter a Company Name; this is the name clients will see.
- Enter the company's legal name, for 1099 or other purposes.
- Enter the company short name.
This will not be seen by clients but is used for logging in so try to keep it short and simple. - Usually, you will want to enter the commission you pay to the company or main agent here at the company level.
You or the owner of this sub-agency will be able to set individual agent rates within the agency.
For example, you may pay Travel with Simone 70% for all bookings made through your agency,
but Simone may have an agent who she then pays 70% of what she receives.
TESS will calculate payments through any number of sub-agencies and sub-agents. - Click Save.
Once saved you can click the Users tab to begin adding users, just as described above.
The sub-agency capabilities of TESS are very flexible and can support a variety of needs.
If you plan to add sub-agencies we do recommend contacting support the first time just to talk through your specific needs.
TESS pricing is always per-agent, so there is no additional cost for sub-agencies.
Paying for Agent Subscriptions
TESS' payment options are very flexible.
You can pay for your agent's entire subscription, pay for only their Standard access, or allow them to pay for their own account.
If you pay for their Standard access, they will still have the option to upgrade at their own expense and only pay the difference.
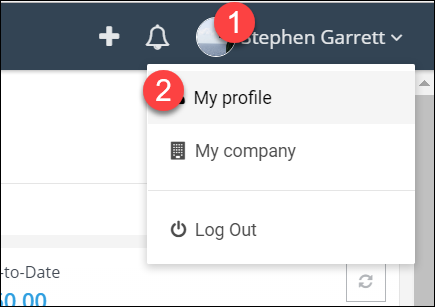
- Login under your admin account, click your name in the upper right corner.
- Click My Profile.
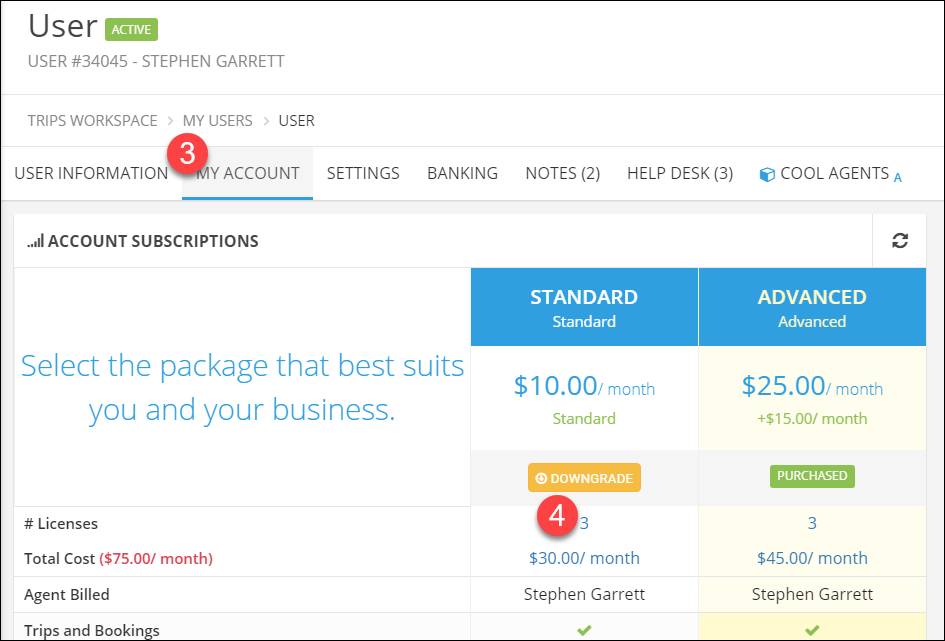
- Click the My Account tab.
- Click the number of licenses under the Standard column (this will usually be 1 the first time you go in).
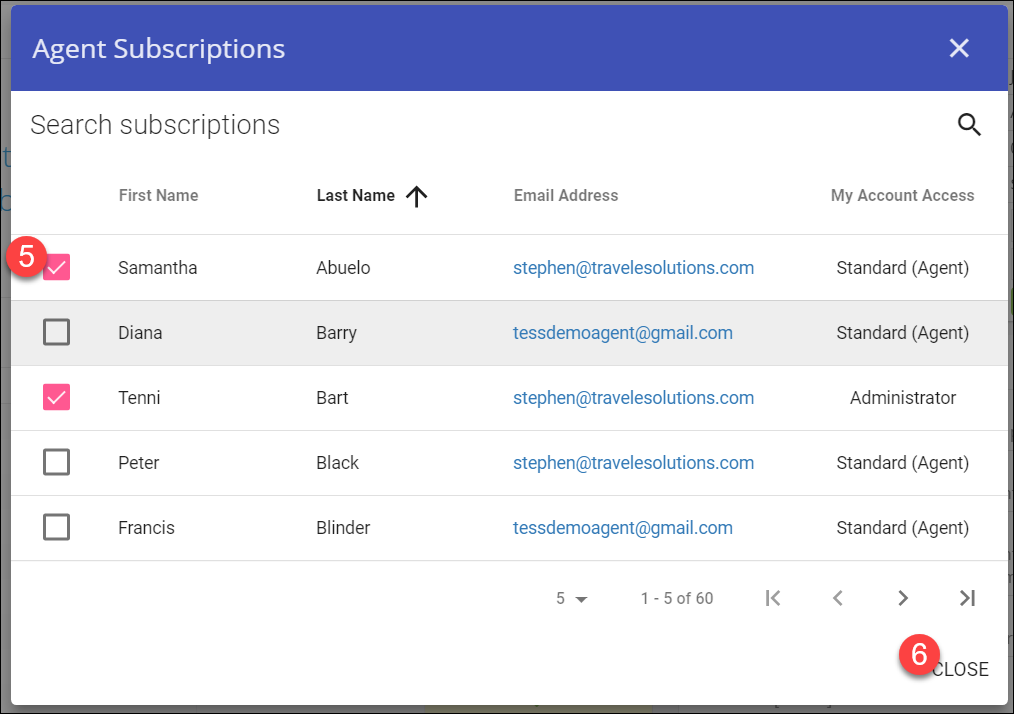
- Check the box next to each agent whose account you want to have paid from your agency account.
- Click Close.
Repeat this process under the Advanced column if you want to pay for the Advanced package as well.
Be sure you have added a credit card on this page as well!