Using Trip Extensions
Add an Automatic Extension to a Trip
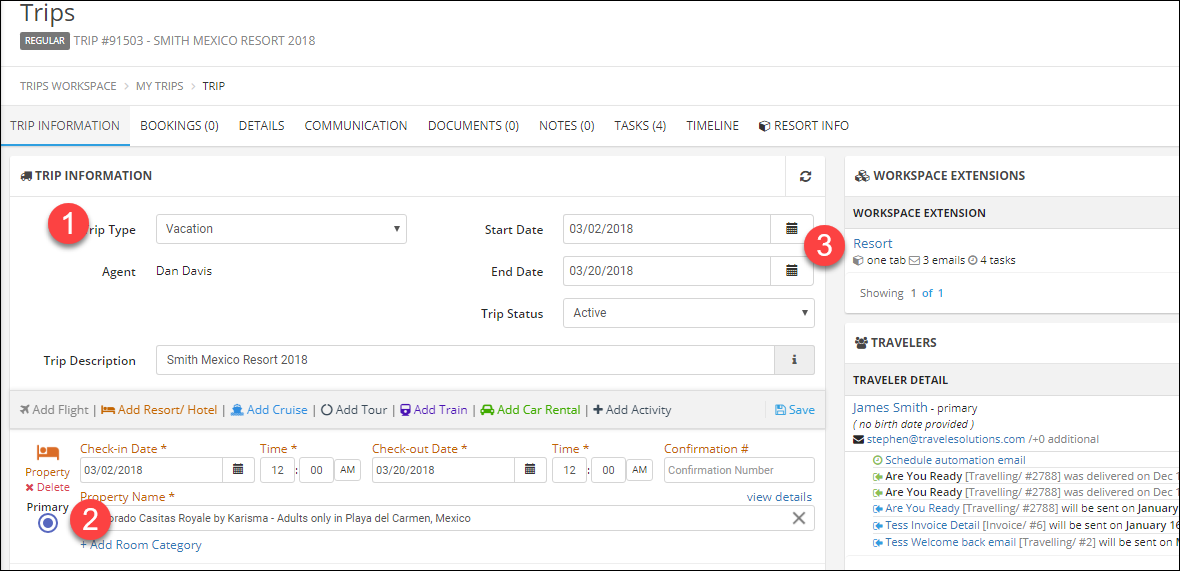
In this section, we can see that the extension we created was added automatically because the trip is a vacation and a resort.
This configuration is specific to one of our demo companies; your settings will be different depending on how you set up your extensions.
- The trip type is set to Vacation.
- The primary itinerary item is a Hotel/Cruise.
- The extension "Resort" was added automatically.
Manually Add an Extension to a Trip
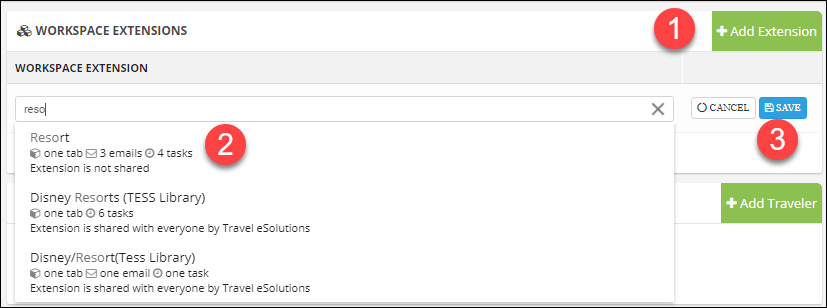
- Click Add Extension.
- Search for and click the extension name.
- Click Save.
Extension Actions
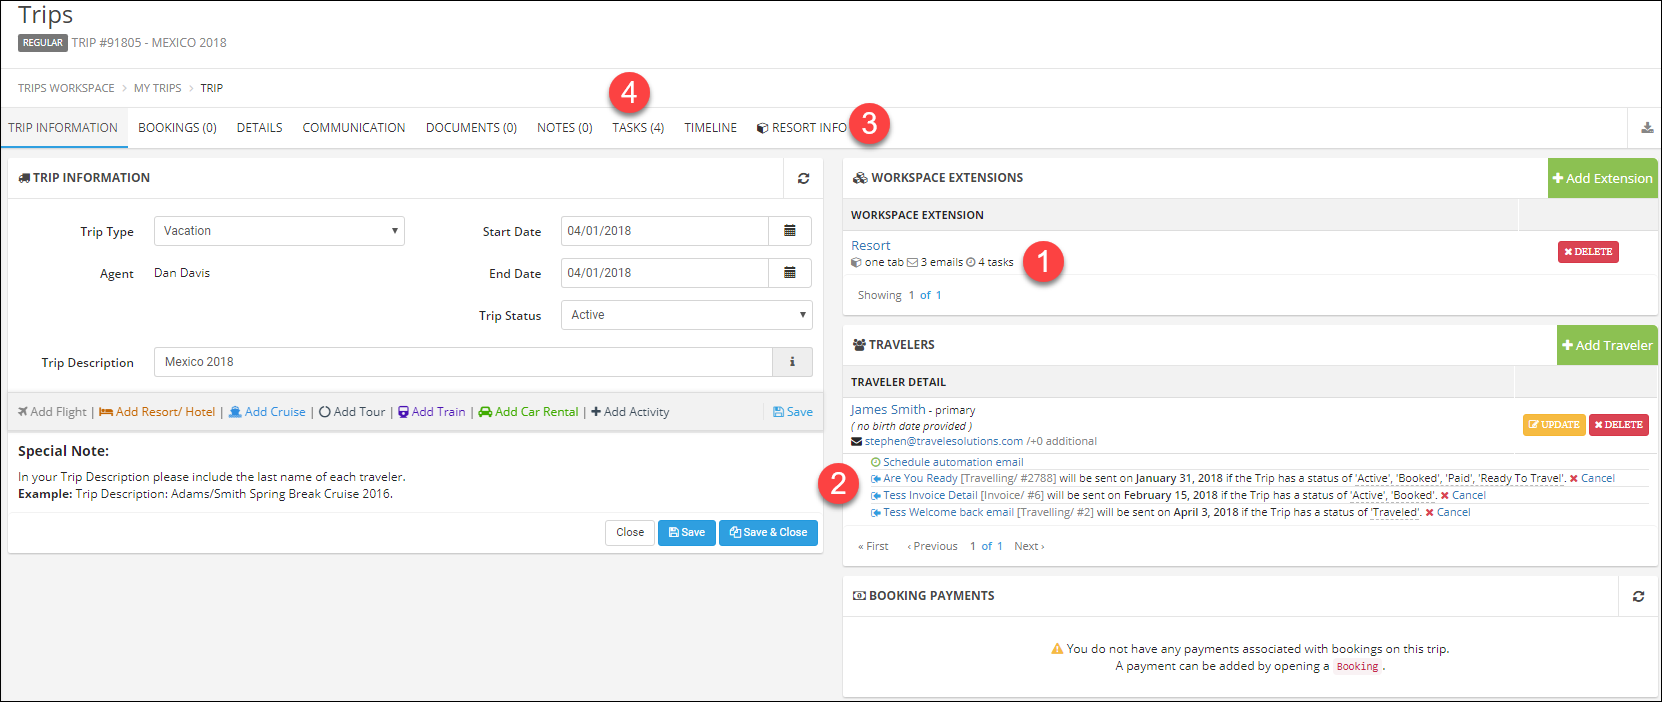
- You can see in the summary that this extension added one tab, three emails, and four tasks.
- In the traveler section, you can see the emails that were scheduled, as well as the dates and statuses.
The emails will only be sent if the trip is in one of the listed statuses on the date shown.
If your extension is added before travelers are added, the email automation will still be added when you add travelers.
NOTE: Email automation is part of the Advanced package. - The custom tabs added have the cube icon next to the title.
- The tasks can be accessed like normal tasks through the Tasks tab.