Creating Clients
Everything you need to know about managing Clients and Leads.
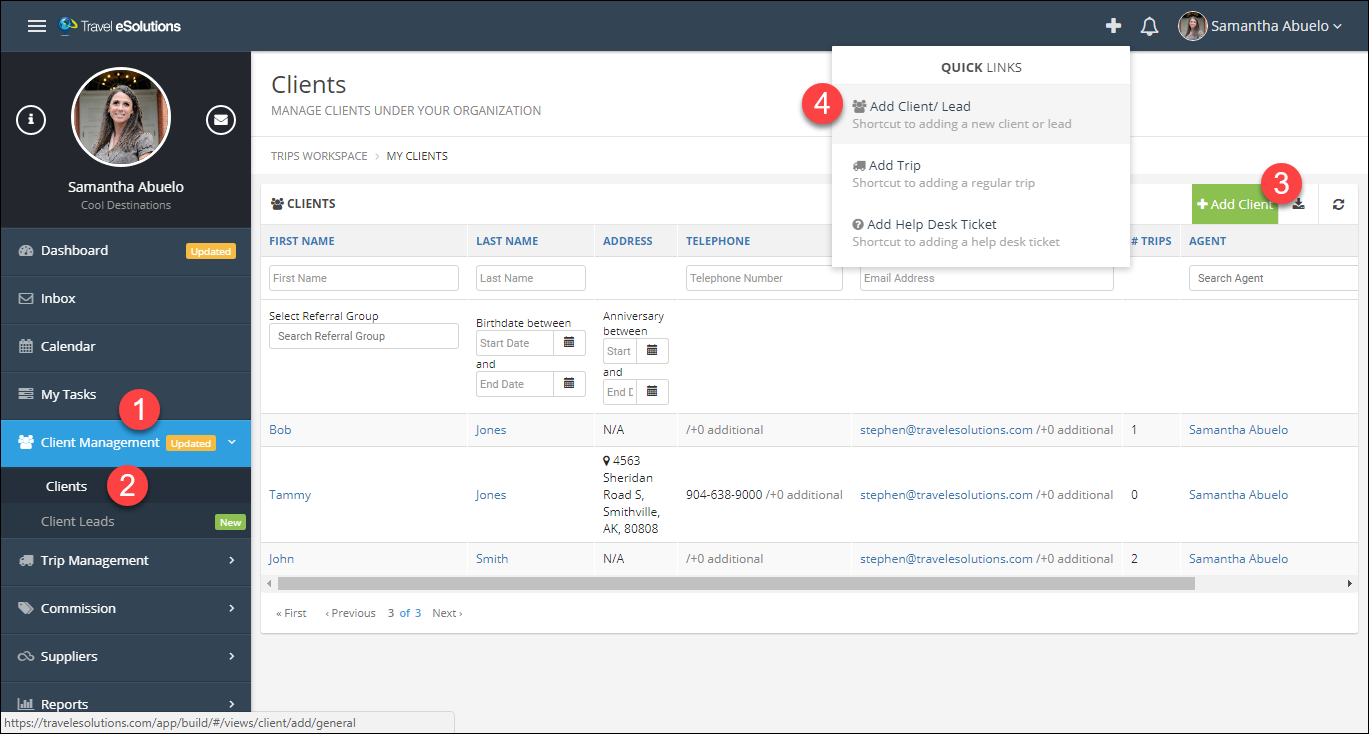
Create a Client
- In the Main Menu click Client Management.
- Click Clients.
- Click Add Client.
- Alternative: click the Quick Links (+) menu then click Add Client/Lead.
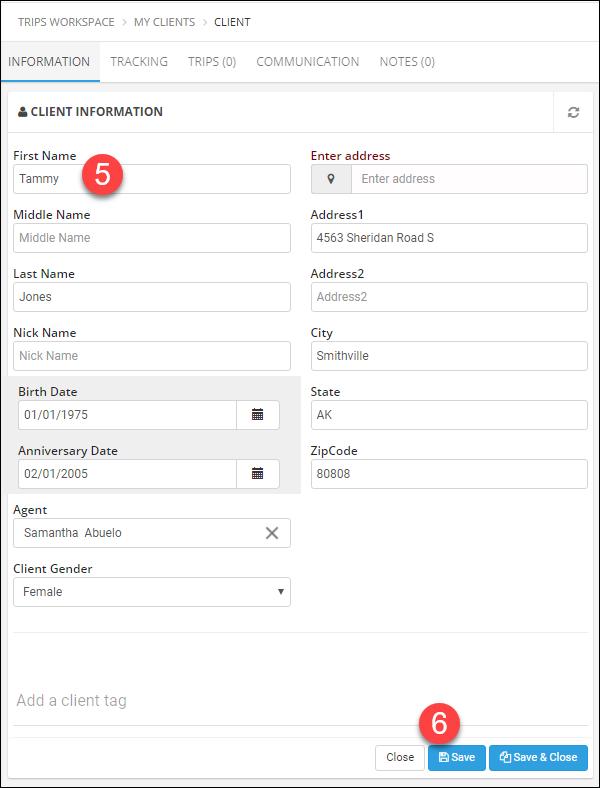
- Enter first and last name (required) and any other information you have available.
- Click Save.
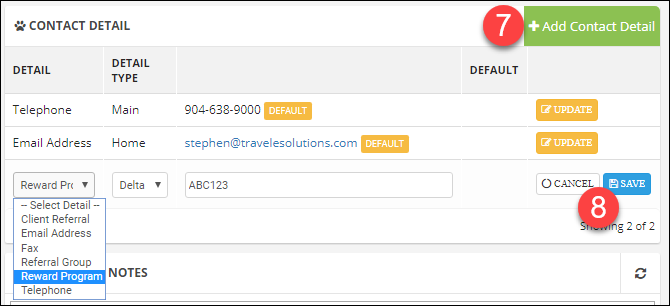
- Click Add Contact Detail to add additional information such as:
Client Referral name
Email Addresses
Fax numbers
Referral Group (primarily used for leads)
Reward Programs (frequent flier numbers, etc.)
Phone Numbers - Be sure to click Save after each new entry.
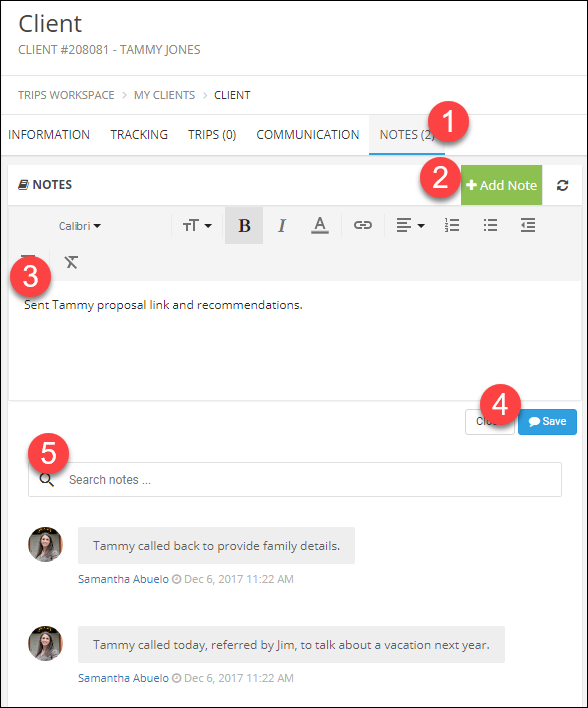
Step 2: Add Notes
- Click the Notes tab.
- Click Add Note.
- Enter any notes you would like to have attached to this client.
Tip: There is also a notes tab in Trips, if the note pertains to a specific trip consider adding it there instead. - Click Save.
- In the Search field, you can find previously entered notes.